What to do if Your Insteon Hub has Stopped Working
Use Groups to Control Multiple Devices Simultaneously with Amazon Echo
If you want to control multiple Insteon lights and appliances with a single voice command or control Insteon devices alongside connected home devices from other manufacturers that are also supported by Amazon Echo, create groups in the Amazon Alexa app.
Add Groups to the Amazon Echo App
Step 1
Launch the Alexa app and tap the “Devices” button in the bottom right corner.
Step 2
Tap the “+” sign in the top right corner to add a device or a group.
Step 3
Tap Add Group
Step 4
Give your group a name and select the devices that you would like to include. When ready, tap Save.
Step 5
Choose the devices you would like to add to your group and then tap on “Save” at the bottom of the screen.

Supported Insteon Devices with Amazon Alexa
While Amazon Alexa supports control of many Insteon devices, not all devices are supported, some devices may not support all features, and some of those features are accessible only through Insteon scenes. Use the table below to identify if your device is supported.
Amazon Alexa control requires Insteon Hub (2245-222).
| Device | Supported with Amazon Echo |
|---|---|
| Dimmer Module | |
| On/Off Module | |
| Outdoor On/Off Module | |
| LED Bulb (A19) |
|
| LED Bulb for Recessed Lights (PAR38) |
|
| Dimmer Switch | |
| Dimmer Switch (1000W) | |
| Dimmer Switch (2-Wire) | |
| On/Off Switch | |
| Dimmer Toggle Switch | |
| On/Off Toggle Switch | |
| Dimmer Keypad (6-Button) | Controls connected light only - scene buttons are voice controllable through Insteon scenes |
| Dimmer Keypad (8-Button) | Controls connected light only - scene buttons are voice controllable through Insteon scenes |
| On/Off Keypad (6-Button) | Controls connected light only - scene buttons are voice controllable through Insteon scenes |
| On/Off Keypad (8-Button) | Controls connected light only - scene buttons are voice controllable through Insteon scenes |
| Dimmer Outlet | |
| On/Off Outlet (2011) | |
| On/Off Outlet (2014) | Controls top outlet only - bottom outlet is voice controllable through Insteon scenes |
| Wired Thermostat | Temperature changes only. Not all revisions support control with Amazon Echo. |
| Wireless Thermostat | - |
| Venstar Thermostat Adapter | - |
| Ceiling Fan Controller | Controls connected light when addressing device directly - fan speeds are voice controllable through Insteon scenes |
| Dimmer DIN Rail Module | |
| On/Off DIN Rail Module | |
| Dimmer Micro Module | |
| On/Off Micro Module | |
| Open/Close Micro Module | - |
| 0-10V Ballast Dimmer | |
| Dimmer In-Line Module | |
| On/Off In-Line Module | |
| 220V Load Controller (Normally Open) | - |
| 220V Load Controller (Normally Closed) | - |
| WiFi Cameras | - |
| Open/Close Sensor | - |
| Hidden Door Sensor | - |
| Motion Sensor | - |
| Leak Sensor | - |
| Smoke Bridge | - |
| IO Module | - |
| Mini Remotes | - |
| Door Lock and Deadbolt Controller | - |
| IR Transmitter | - |
| IR Receiver | - |
| Serial Bridge | - |
| iMeter Solo | - |
| SynchroLinc | - |
Amazon Echo Didn't Control My Devices As Expected
When using Amazon Echo to control your Insteon lights and appliances, you may encounter a situation where Alexa does not perform the expected or desired action. There are several reasons why this may occur.
Your voiced command included contradictory operations
Amazon Echo misheard your request
Amazon Echo heard your request correctly but an issue communicating with Insteon prevented your lights or appliances from operating as expected
Contradictory Commands
When issuing commands to Amazon Echo, ensure that your statements do not include contradictions. Amazon Echo may not respond as expected if you request multiple differing operations (off and brighten, for example) in the same statement.
If the names of your Insteon lights and appliances include words like "on," "off," "bright," "dim," or "set," Amazon Echo may misinterpret the name of your device as your desired action for that device. To avoid this issue, rename your devices using the Insteon app and ask Amazon Echo to discover your devices.
Amazon Echo Misheard Your Request
You can view a transcript of your requests to Amazon Echo. If Echo has misunderstood your request, you can also provide feedback on what you had hoped would happen.
Step 1
Launch the Alexa app and tap the drawer button in the upper left corner

Step 2
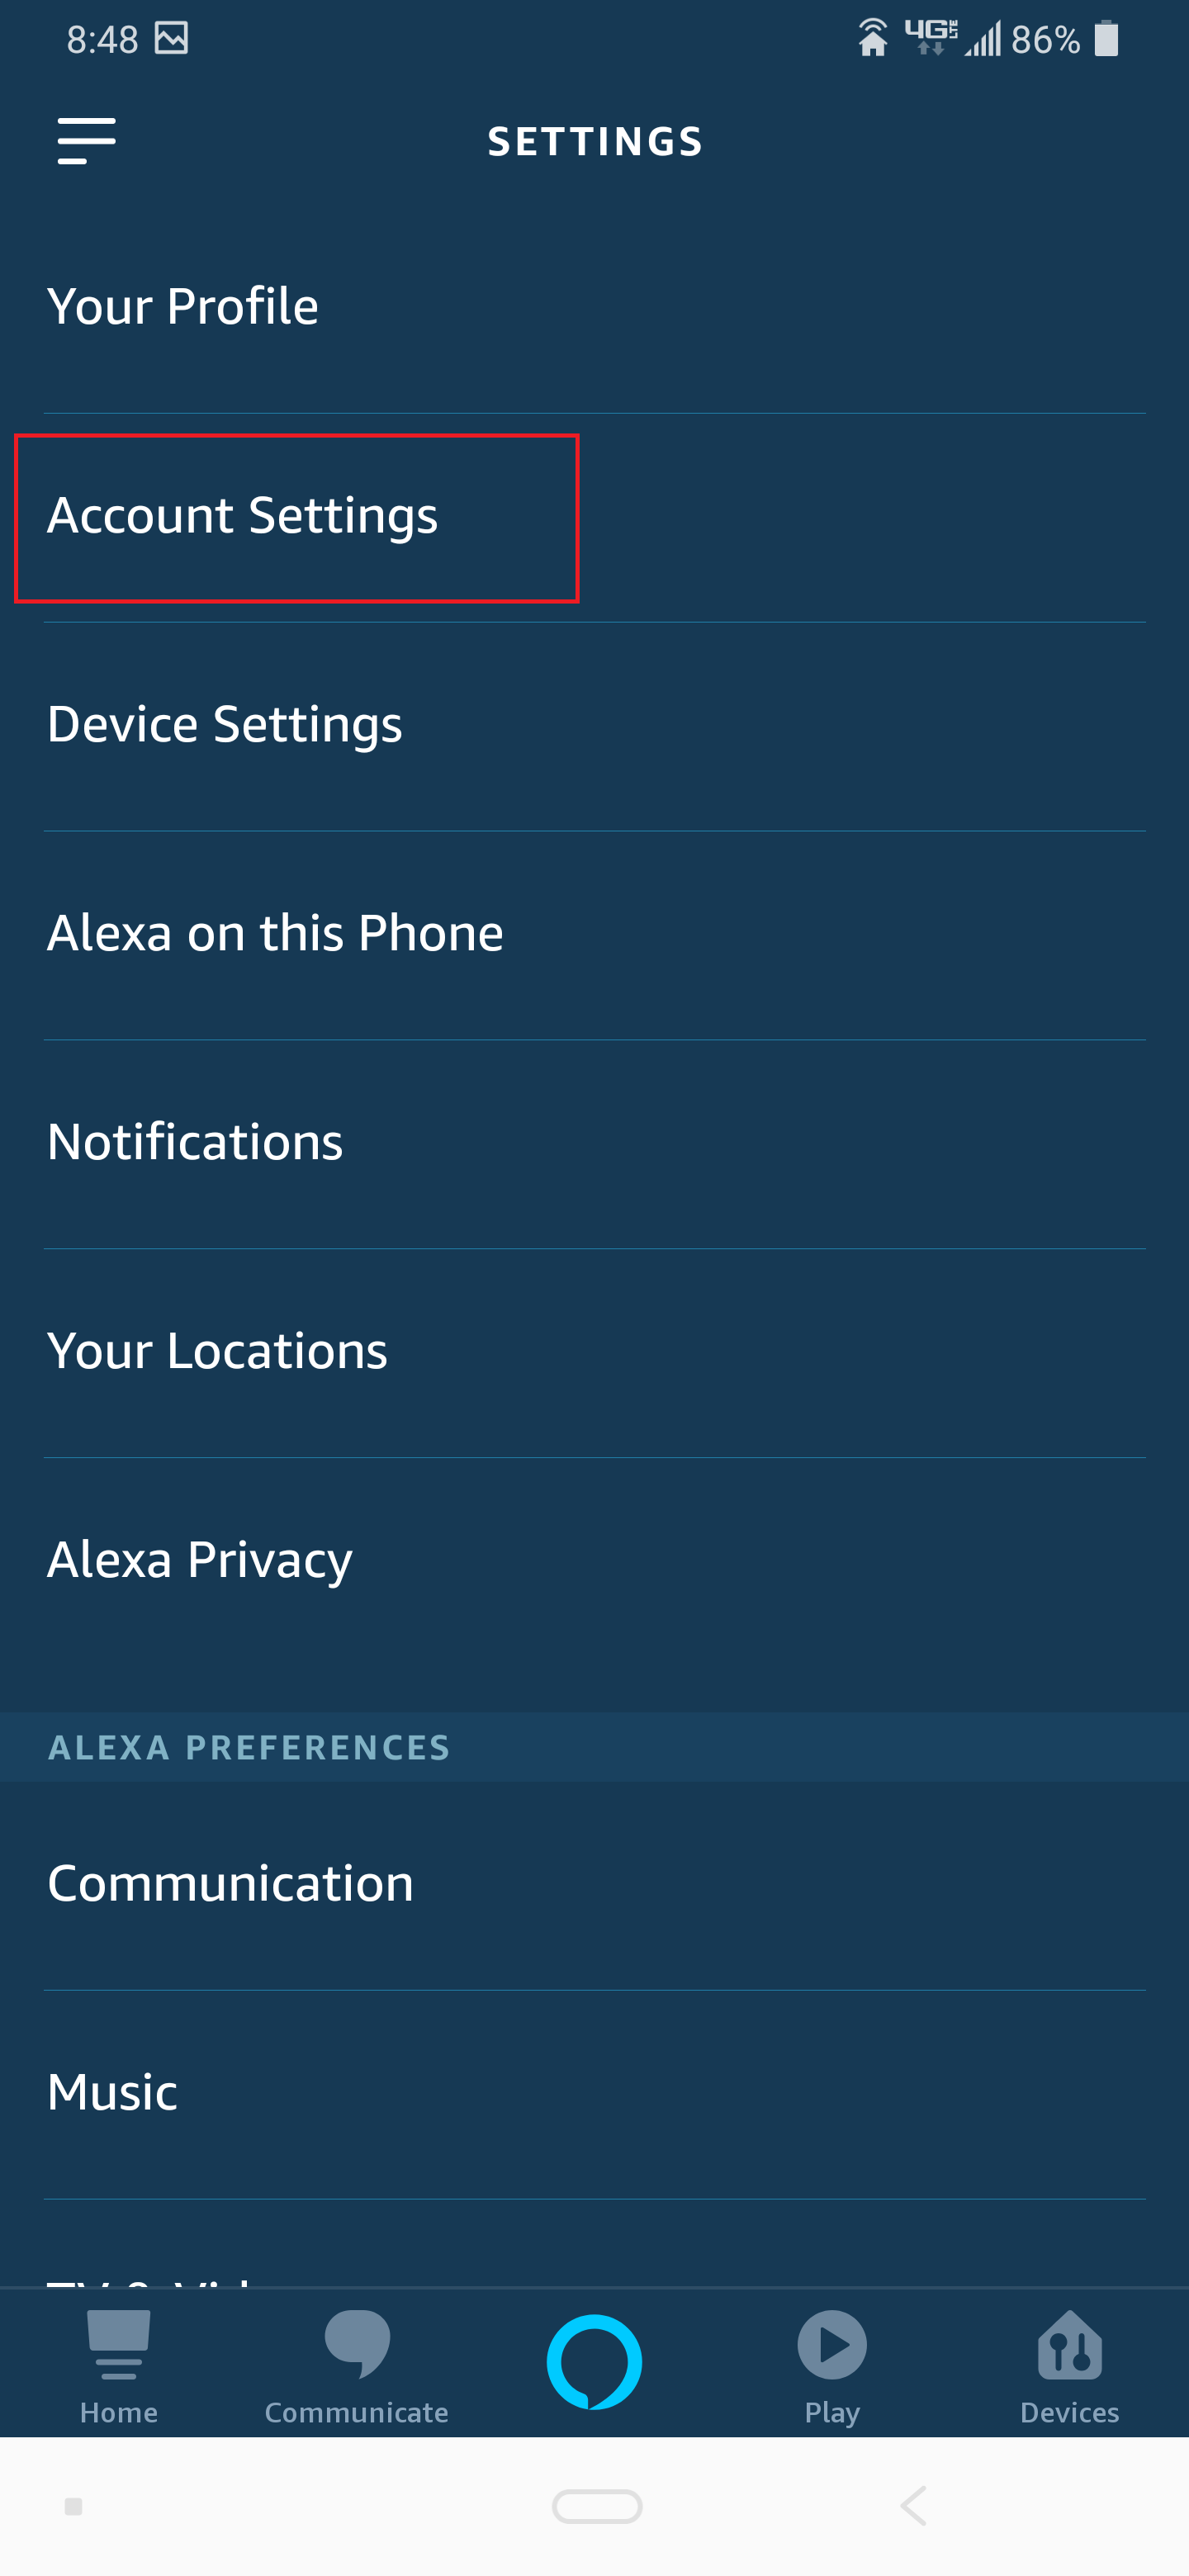
Tap Settings

Step 3
Tap Account Settings
Step 4
Tap History

Step 5
This screen shows your Echo’s history. You can sort by Date Range and delete recordings. You can also provide feedback to help Alexa understand you better by clicking on the down arrow by one of your recordings.

Step 6
If the transcription does not match your utterance, tap "No" under Did Alexa do what you wanted. If the transcription does match your utterance but the expected Insteon devices were not controlled, contact Insteon Support and reference this article. If necessary, Insteon Support will create a support ticket to investigate your issue.


Control Insteon Devices from your Logitech Harmony Hub
With Insteon Hub (2245-222) and Harmony Ultimate Home, Harmony Home Control or Harmony Home Hub, you can integrate your Insteon-controlled lights and appliances with your home entertainment system.
Add Insteon Hub to the Harmony App
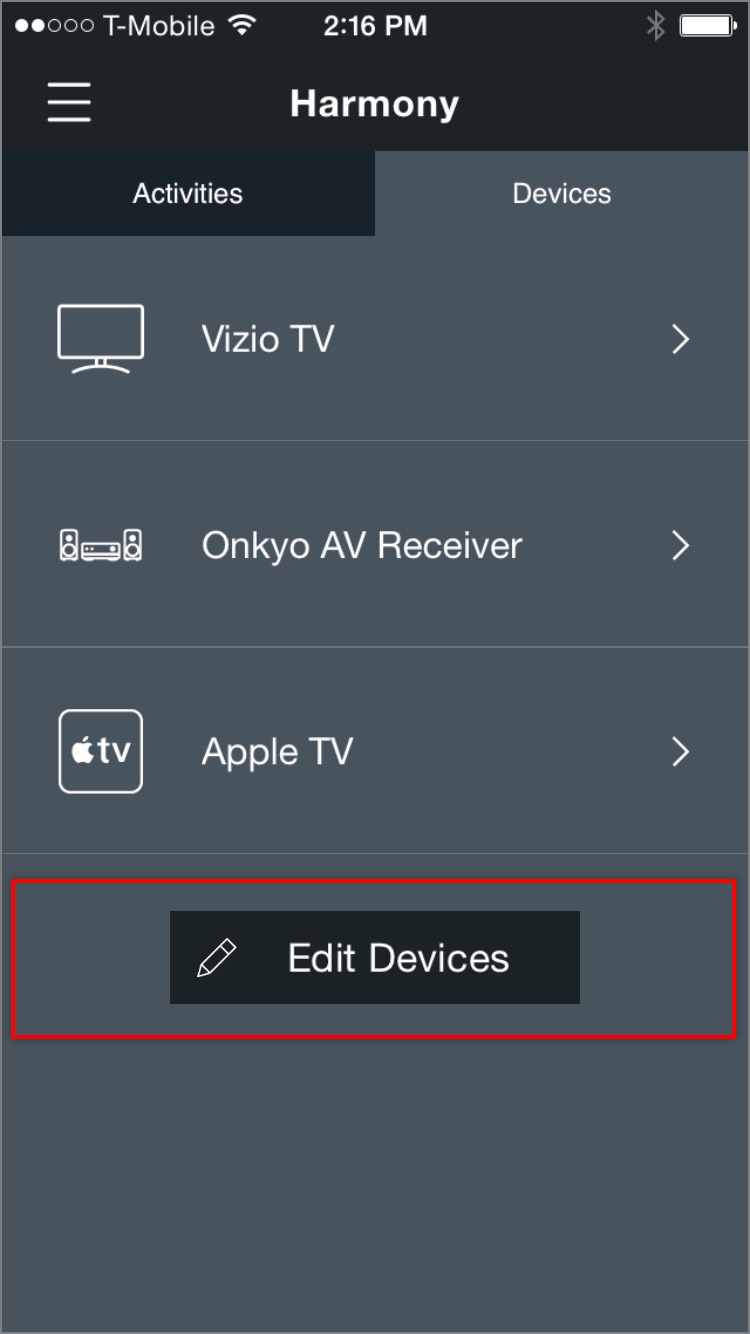
Step 1
Launch the Harmony app on your smartphone and navigate to Devices. Tap the Edit Devices button.
Step 2
Tap the + Device button.

Step 3
Tap Home Control

Step 4
Tap Insteon Hub

Step 5
To connect your Insteon Hub to your Harmony Hub, you will need to enter your Insteon account information. Tap Sign In.

Step 6
Enter your Insteon account user name and password.

Step 7
After a few moments, you will see a list of supported Insteon devices that can be used in Harmony activities.

Configuring On/Off Devices
If your home includes On/Off devices like On/Off Outlet or On/Off Module, Harmony requires that you categorize the controlled device as either a Light or a Plug.
Step 1
To specify the type of controlled device, tap the device name.
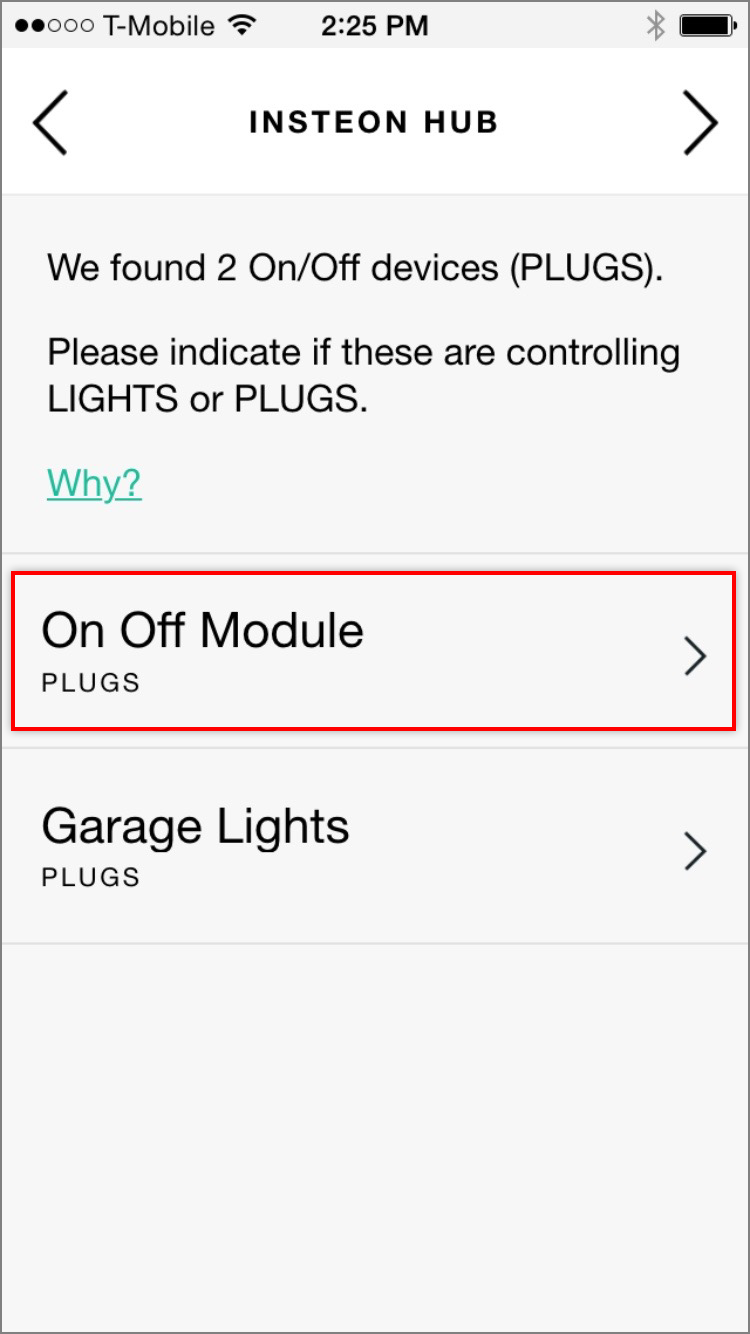
Step 2
Tap Lights or Plugs to change the Harmony's categorization for that device.

Control Insteon Devices from Logitech Harmony Home Control Buttons
With Insteon Hub (2245-222) and Harmony Ultimate Home Control or Harmony Home Hub, you can control Insteon lights and appliances directly from your remote control using the Home Control buttons.
Assign Insteon Devices to your Remote's Home Control Buttons
Step 1
From the Harmony app, open the settings drawer
Step 2
Tap Harmony Setup
Step 3
Tap Add/Edit Devices & Activities
Step 4
From the Settings screen, scroll down and select Remote & Hub
Step 5
Tap Harmony Home Control Button Customization
Step 6
Tap Home Control Buttons
Step 7
Tap the button for which you would like to assign an Insteon device and then tap the Assign button to chose an Insteon light or appliance.
Repeat these steps for the four Home Control buttons and, when finished, tap the next arrow.
Include Insteon Devices in Logitech Harmony Activities
After you have added Insteon Hub to your Harmony Home Ultimate, Harmony Home Control or Harmony Home Hub, you can add Insteon devices to your Harmony Activities.
Add Insteon Devices to a Harmony Activity
Insteon devices can be added when you create a new Harmony activity or added to an existing activity. These instructions show you how to add Insteon devices to an existing Harmony activity.
Step 1
From the Activities tab in the Harmony app, tap Edit Activities.
Step 2
Tap the activity for which you would like to add Insteon devices.
Step 3
On the Activity Summary screen, scroll down and tap Re-Run Activity.
Step 4
Tap the checkbox for each Insteon device that you would like to include.
Step 5
Follow the on-screen instructions to move through the setup wizard until you reach Adjusting Devices.
Tap the checkbox for each device that you would like to include when your activity starts.
Step 6
Adjust the devices to their desired states, making sure to tap the power symbol if you want the light or appliance on. To brighten or dim a light, drag the vertical black line between low and high.
Step 7
You can chose when Harmony will control these devices by tapping the When to Adjust button.
Step 8
Tap the next arrow and repeat the adjustment steps for when your activity ends. When finished, tap the next arrow to save your changes and complete setup.
No Insteon Devices found when Adding Insteon Hub to Logitech Harmony Home
You may occasionally encounter a message informing you that Harmony Hub couldn't find any supported devices in your Insteon Hub account. There are several reasons why this might occur.
- You don't have any devices setup with your Insteon Hub
- You don't have any controllable devices setup with your Insteon Hub
- An error may have occurred while downloading your Insteon Hub configuration
Refresh your Insteon Hub Devices
Step 1
Tap Refresh / Re-Login

Step 2
Wait while Harmony Hub discovers your Insteon devices. If Harmony still doesn't discover any devices, try removing and re-adding Insteon Hub from the Harmony app.

Supported Insteon Devices with Logitech Harmony
While Logitech Harmony Home supports control and monitoring of many Insteon devices, not all devices are supported and some devices may not support all features. Use the table below to identify if your device is supported.
Logitech Harmony Home requires Insteon Hub (2245-222).
| Device | Supported in Harmony |
|---|---|
| Dimmer Module | |
| On/Off Module | |
| Outdoor On/Off Module | |
| LED Bulb (A19) |
|
| LED Bulb for Recessed Lights (PAR38) |
|
| Dimmer Switch | |
| Dimmer Switch (1000W) | |
| Dimmer Switch (2-Wire) | |
| On/Off Switch | |
| Dimmer Toggle Switch | |
| On/Off Toggle Switch | |
| Dimmer Keypad (6-Button) | Controls connected light only |
| Dimmer Keypad (8-Button) | Controls connected light only |
| On/Off Keypad (6-Button) | Controls connected light only |
| On/Off Keypad (8-Button) | Controls connected light only |
| Dimmer Outlet | |
| On/Off Outlet (2011) | |
| On/Off Outlet (2014) | Controls top outlet only |
| Wired Thermostat | - |
| Wireless Thermostat | - |
| Venstar Thermostat Adapter | - |
| Ceiling Fan Controller | Controls connected light only |
| Dimmer DIN Rail Module | |
| On/Off DIN Rail Module | |
| Dimmer Micro Module | |
| On/Off Micro Module | |
| Open/Close Micro Module | - |
| 0-10V Ballast Dimmer | |
| Dimmer In-Line Module | |
| On/Off In-Line Module | |
| 220V Load Controller (Normally Open) | - |
| 220V Load Controller (Normally Closed) | - |
| WiFi Cameras | - |
| Open/Close Sensor | Monitoring only. Not currently supported as an activity trigger. |
| Hidden Door Sensor | Monitoring only. Not currently supported as an activity trigger. |
| Motion Sensor | Monitoring only. Not currently supported as an activity trigger. |
| Leak Sensor | Monitoring only. Not currently supported as an activity trigger. |
| Smoke Bridge | - |
| IO Module | - |
| Mini Remotes | - |
| Door Lock and Deadbolt Controller | - |
| IR Transmitter | - |
| IR Receiever | - |
| Serial Bridge | - |
| iMeter Solo | - |
| SynchroLinc | - |
Incorrect Account User Name or Password during Hub Setup

You may occasionally encounter an alert informing you that your account user name or password is incorrect during initial Insteon Hub setup. There are several reasons why this might occur.
- The user name or password was mistyped.
- The user name or password has been changed since the last login with the Insteon app.
- Your account entry in Insteon's database may be damaged and need to be recreated.
Resolution
If you encounter this message while attempting to add an Insteon Hub for the first time, please contact Insteon support and reference this article.
If you encounter this message while attempting to add a second Insteon Hub, try signing out of the Insteon app and then begin the add process again. If you still encounter this message, please contact Insteon support and reference this article.
Connect to Wi-Fi and Scan the QR Code Again

When setting up an Insteon Hub (2014) for the first time, you may encounter an alert informing you to connect to your home's WiFi network and scan the QR code again. This alert will appear for Insteon Hubs with firmware versions 1005 and prior.
Step 1
Tap the Home button on your iPhone, iPad or iPod touch and navigate to settings.
Step 2
Tap WiFI
Step 3
Ensure WiFi is on and tap your home's WiFi network.
If you have more than one WiFi router, it is important to join the WiFi network created by the router into which your Insteon Hub is connected. Learn more about identifying your home's WiFi router.
Step 4
Tap the Home button on your iPhone, iPad or iPod touch and return to the Insteon app.
Sensor Shows Unknown Status

A sensor or other battery-powered device will show a yellow status circle and report "Unknown" if the Insteon Hub is unable to ascertain a sensor's status.
- If your sensor was recently added to the Insteon App, tap the sensor's set button. This should update the status in the Insteon Hub and the app should begin tracking the status of the sensor.
- If your sensor has been added to the Insteon App for a while and has only recently begun showing Unknown, it is possible that the Sensor's battery is low and needs to be replaced.
A wall-powered device may also show Unknown status. Ensure that the device is still connected to power and shows a red, green or white status LED. If not, check the power to the device. If power is normal, contact Insteon Support for additional troubleshooting or consult the product's Owner's Manual.
Supported Insteon Devices with the Insteon for Hub App
This chart shows supported Insteon devices on iOS, Android, Windows and Windows Phone. The information in this chart is applicable for Insteon Hub (2242-222) and Insteon Hub (2245-222) with the Insteon for Hub app.
For a list of supported devices for the HomeKit-enabled Insteon Hub (2243-222) and Insteon+ app, see this article instead.
If you need help identifying your version of Insteon Hub, see this article.
| iOS | Android | Windows | Windows Phone | |
| Dimmer Module | ||||
| On/Off Module | ||||
| Outdoor On/Off Module | ||||
| LED Bulb | ||||
| LED Bulb for Recessed Lights | ||||
| Dimmer Switch | ||||
| Dimmer Switch (1000W) | ||||
| Dimmer Switch (2-Wire) | ||||
| On/Off Switch | ||||
| Dimmer Keypad (6-Button) | Load Only | Load Only | ||
| Dimmer Keypad (8-Button) | Load Only | Load Only | ||
| On/Off Keypad (6-Button) | Load Only | Load Only | ||
| On/Off Keypad (8-Button) | Load Only | Load Only | ||
| Dimmer Outlet | ||||
| On/Off Outlet (2007) | ||||
| On/Off Outlet (2014) | Upper Outlet Only | Upper Outlet Only | ||
| Wired Thermostat | ||||
| Wireless Thermostat | - | - | - | - |
| Thermostat Adapter | ||||
| Mini Remote (Wireless Switch) | - | - | - | |
| Mini Remote (4-Scene) | - | - | - | |
| Mini Remote (8-Scene) | - | - | - | |
| WiFi Camera | ||||
| HD WiFi Camera | - | - | ||
| Outdoor WiFi camera | ||||
| HD Outdoor WiFi Camera | - | - | ||
| Open/Close Sensor | ||||
| Hidden Door Sensor | ||||
| Motion Sensor | ||||
| Leak Sensor | ||||
| Smoke Bridge | ||||
| IO Module | ||||
| Ceiling Fan Controller | Light Only | Light Only | ||
| Dimmer Micro Module | ||||
| On/Off Micro Module | ||||
| Open/Close Micro Module | ||||
| Ballast Dimmer | ||||
| Dimmer In-Line Module | ||||
| On/Off In-Line Module | ||||
| 220V Load Controller | ||||
| Dimmer DIN Rail Module | ||||
| On/Off DIN Rail Module | ||||
| MorningLinc / MiLock Controller | - | - | ||
| IRLinc Transmitter | - | - | - | - |
| IRLinc Receiver | - | - | - | - |
| SeriaLinc | - | - | - | - |
| Range Extender | ||||
| Energy Display | - | - | - | - |
| iMeter Solo | - | - | - | - |
| SynchroLinc | - | - | - | - |
| X10 | Hub (2012) Only | Hub (2012) Only | - | - |
Insteon Hub (2012) and Daylight Saving Time
Insteon has identified an issue that may prevent Insteon Hub (2012) from automatically adjusting to Daylight Saving Time on 8 March 2015.
To reset your Hub's internal clock, perform the following actions:
- Log into your Insteon App
- Navigate to Settings
- Select House
- Select Hub Location and follow the steps to set your Hub's physical location. If you have already performed this step prior, you may need to perform it again to update your Hub's internal clock.
If you do not perform these steps, your Hub should automatically adjust it's internal clock to match Daylight Saving Time but it will do so 24 hours after the official transition.
This issue does not affect Insteon Hub (2014).
Port Forwarding Guides
The port forwarding set up is reliant upon the specific brand and model number of the router being used. The Insteon Hub (2012) and Insteon WiFi Cameras require forwarding for access to your network device from outside of your home network. The new Insteon Hub (2014) does not require port forwarding. Regardless of the router being used, the process of port forwarding is similar. Below is a list of port forwarding guides for popular routers:
Please follow the link below if your router is not listed.
