When configuring Insteon Wi-Fi Cameras, you may be presented with a message stating that you need to configure port forwarding on your router to see your camera when you are away from home. There are several reasons why this may occur.
Standard-definition Insteon Wi-Fi Cameras require port forwarding for remote access. Learn how to configure port forwarding for remote access.
Some Insteon HD Outdoor Wi-Fi Cameras require port forwarding for remote access
You've added an Insteon HD Wi-Fi Camera that was previously configured
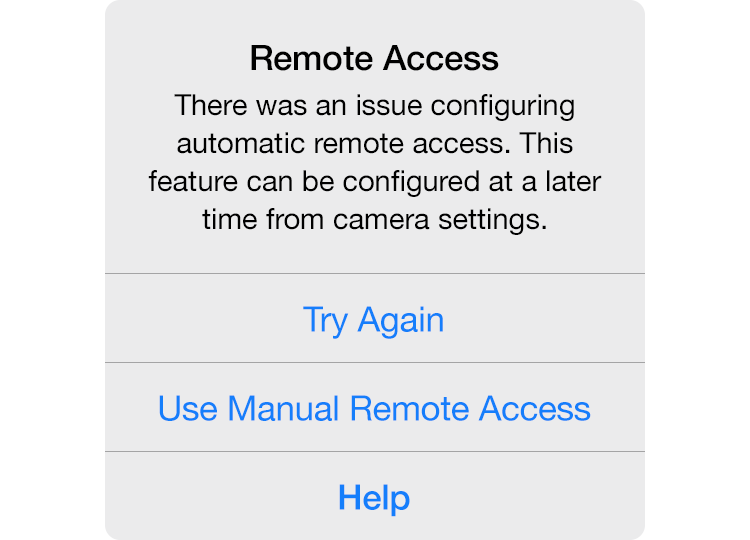
Your Insteon HD Wi-Fi Camera supports Automatic Remote Access but network conditions have prevented the feature from functioning as expected. Learn more about troubleshooting Automatic Remote Access.
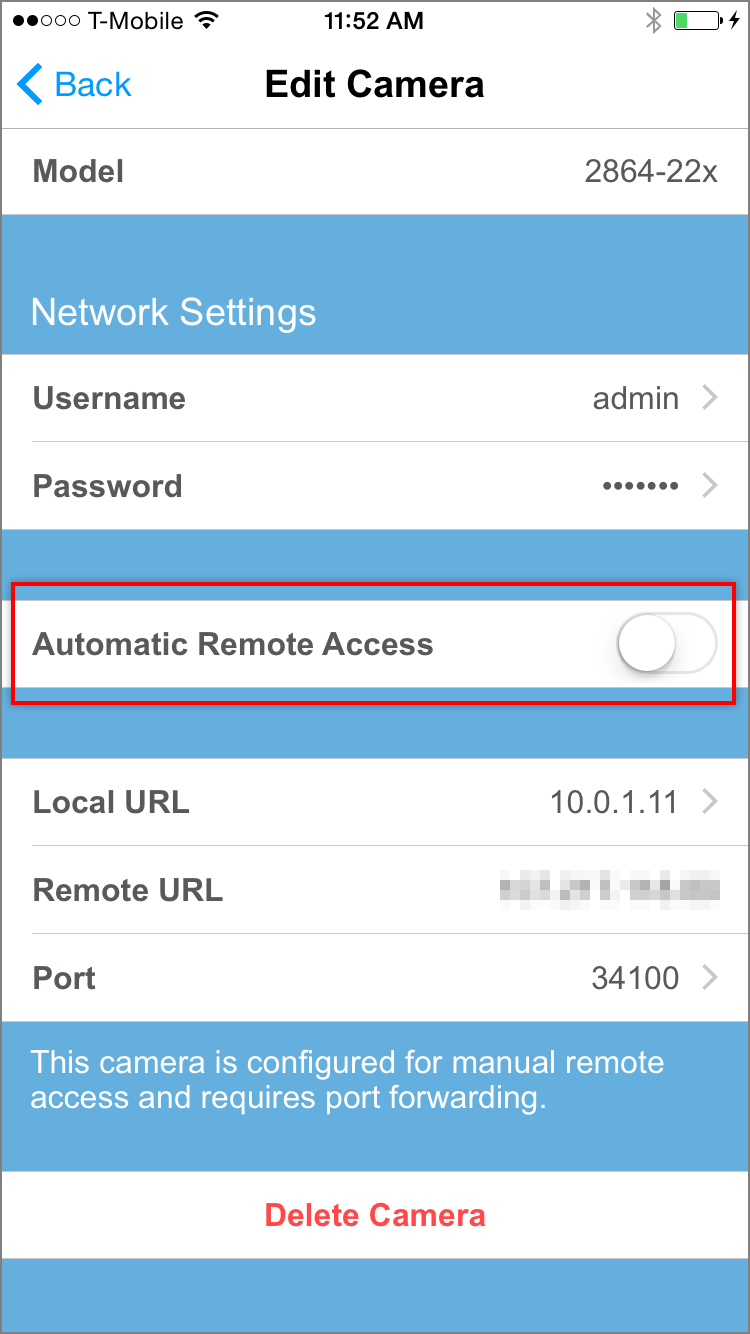
Previously Configured Insteon HD Wi-Fi Cameras
When adding an Insteon HD Wi-Fi Camera that has already been configured with a user name and password, the Insteon app does not alter any camera settings or attempt to configure Automatic Remote Access. Follow the steps in this article If you would like to enable Automatic Remote Access.
Configure Manual Remote Access with Port Forwarding
About Port Forwarding
Port forwarding is a process involving your home's router that allows you to access devices within your home when you are not using your home's Wi-Fi network.
Your home router creates a barrier that prevents your smartphone from talking directly to your Insteon Wi-Fi cameras. Port forwarding opens a door in your router's firewall for a specific function, in this case, access to your Wi-Fi cameras. This procedure needs to be performed for each Wi-Fi camera that you intend to access from outside your home's Wi-Fi network.
Port Forwarding Instructions
Insteon Support has compiled instructions that should help you configure routers that you are likely to have in your home.
Because every router is different and manufacturers are constantly making changes, the steps outlined in these articles may not perfectly match the steps required for your particular router. If you don't see your router brand listed or if you feel uncomfortable with the instructions, contact Insteon Support for further assistance.
For step-by-step instructions, choose your router brand:
Dynamic DNS Services
In addition to configuring your camera and router for port forwarding, you will need to configure a Dynamic DNS Service to ensure reliable access to your camera when you are away from home. Learn more about Dynamic DNS Services and Insteon Wi-Fi Cameras by reading this article.