5 Reasons Insteon is Better than Wi-Fi for Your Smart Home

Insteon and AFCI (Arc-fault circuit interrupter) Circuit Breakers
Years ago, first generation AFCI breakers were manufactured with poor tolerances which caused false triggers from a variety of common appliances, including Insteon powerline signals. Later generations of AFCI breakers are better engineered for real-world electronics and do well at avoiding being falsely triggered. Today there are no issues with using AFCI breakers and our Insteon devices. However, if the installer fails to follow standard wiring rules associated with AFCI circuits, you may experience issues.
Follow these important rules when wiring devices on AFCI circuits:
- Any branch circuits that feed receptacles before switches should be pigtailed connections at the receptacle. This is where you wire the incoming wire and the wire from the panel side and the wire going down stream together with a third wire “the pigtail” that goes to the outlet. DO NOT USE THE OUTLET AS A SPLICE TO CONNECT THE INCOMING AND OUTGOING WIRES BY STABBING THEM INTO THE BACK OF THE OUTLET
- With AFCI breakers it is imperative that wall switches are connected to the same neutral that goes with that circuit. If switch box has two neutrals, only connect the switches neutral wire to the neutral from the circuit the switch is connected to. If an AFCI breaker wont reset after installing an Insteon switch it is because the wrong neutral was used. This can be a result of the electrician crossing neutrals in another box and not the fault of the wiring at the switch box itself.
- Loose or poor splices can cause a situation where an Insteon switch can trip an AFCI breaker. This is not the fault of the switch but the loose connection somewhere in the circuit.
If you are using AFCI breakers and experience false triggers with your Insteon system, please contact us at support@insteon.com and be sure to include the make and model of your AFCI breakers.
Control Insteon Devices from your Google Home
With Insteon Hub (2245-222) and Google Home, you can control Insteon-connected lights and appliances with your voice. The following article covers pairing your Insteon Hub account with the Google Home app.
For Android users with a Home device go to the Google Home support page. If you do not have a Google Home device installed make sure the install the Google Assistant app so that you get access the Google Assistant Home Control settings.
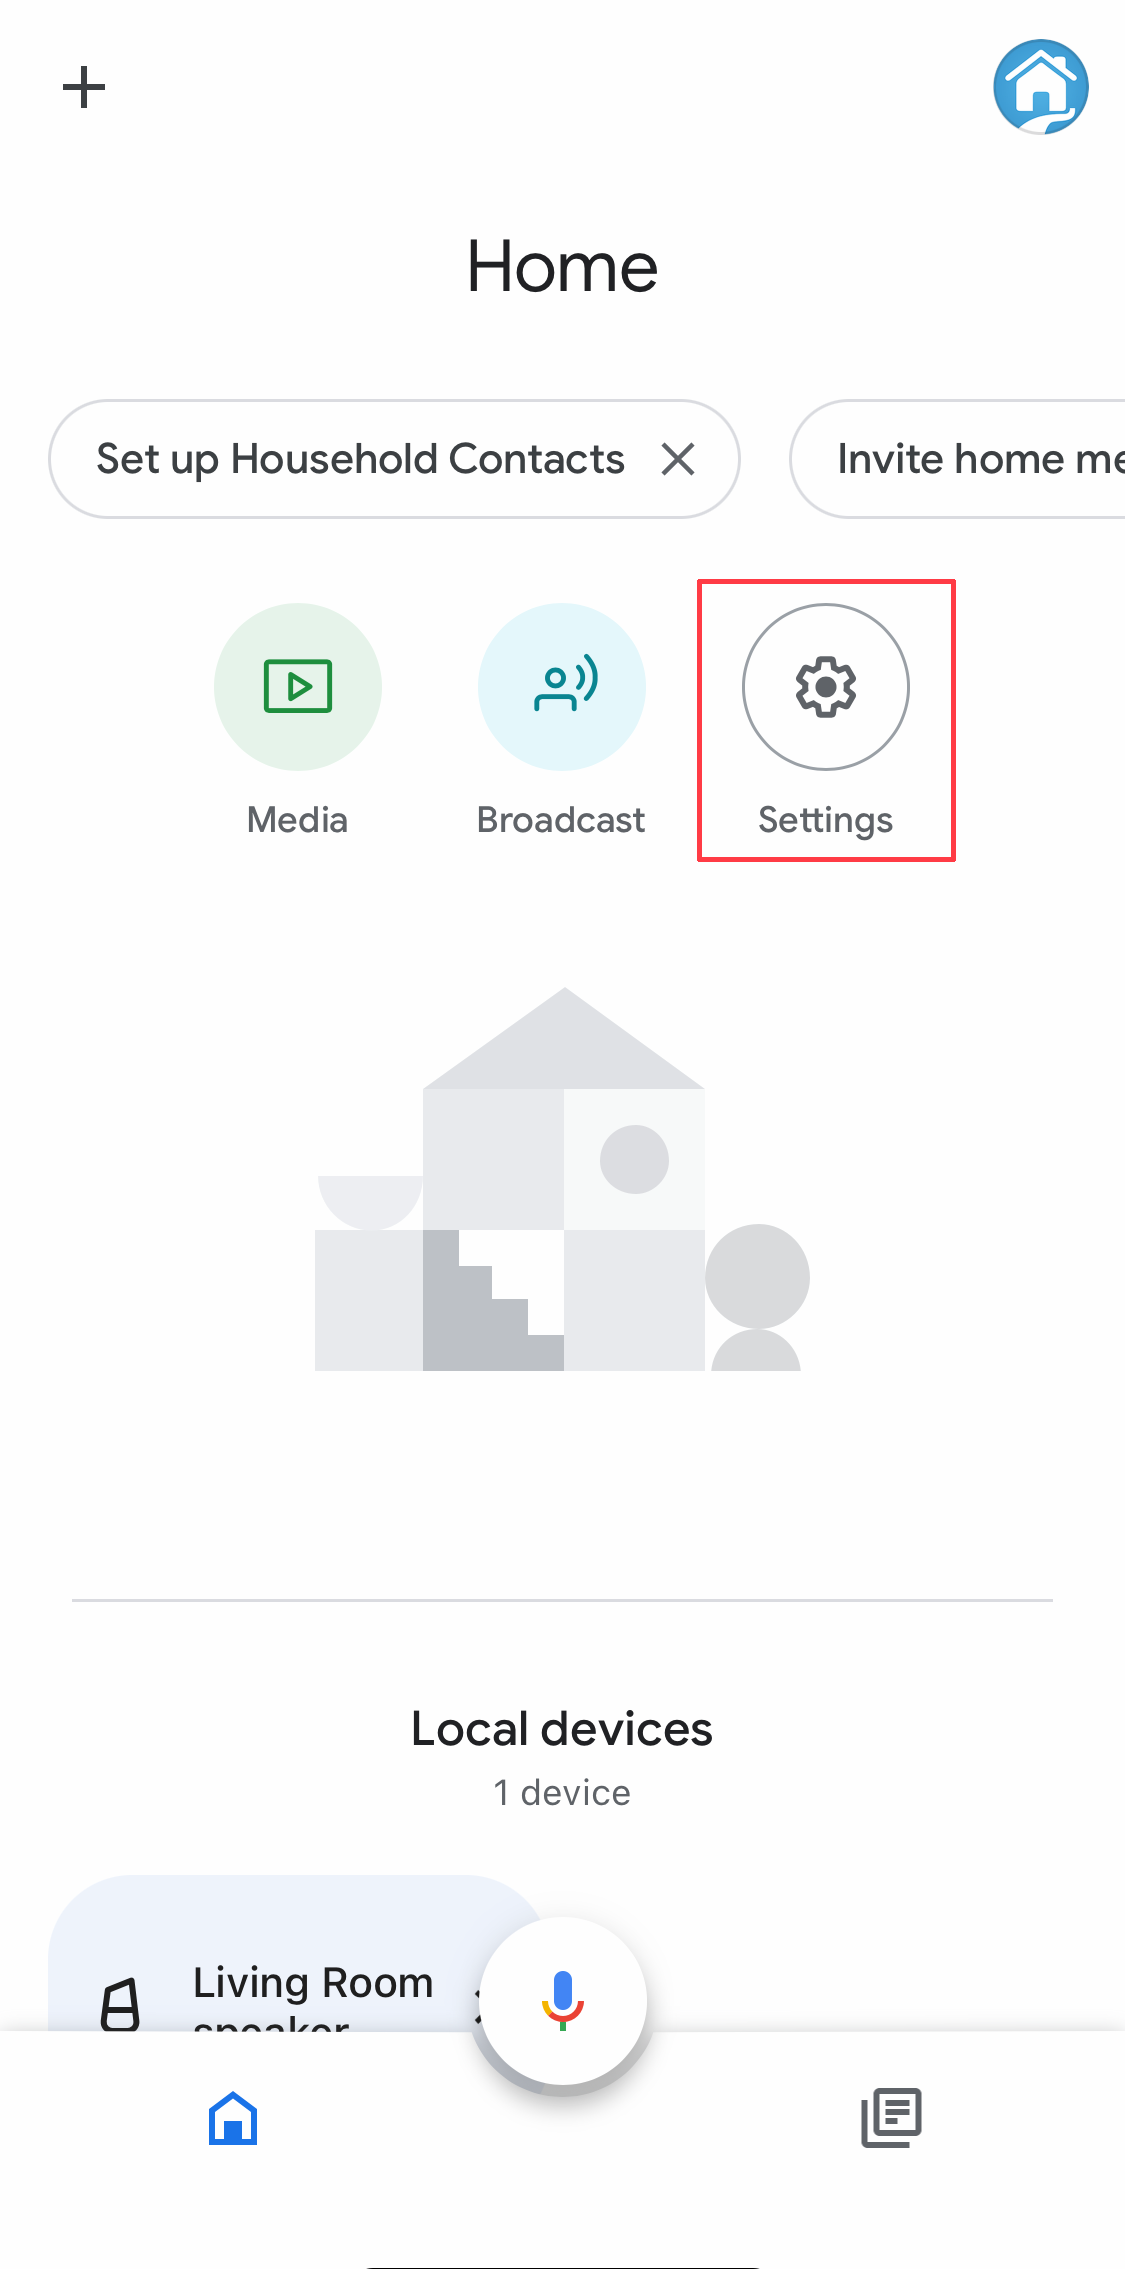
Step 1
Launch the Google Home App and tap the Settings gear icon
Step 2
Scroll all the way to the bottom and tap “Works with Google”

Step 3
Search for Insteon and select Insteon from under the Add new section

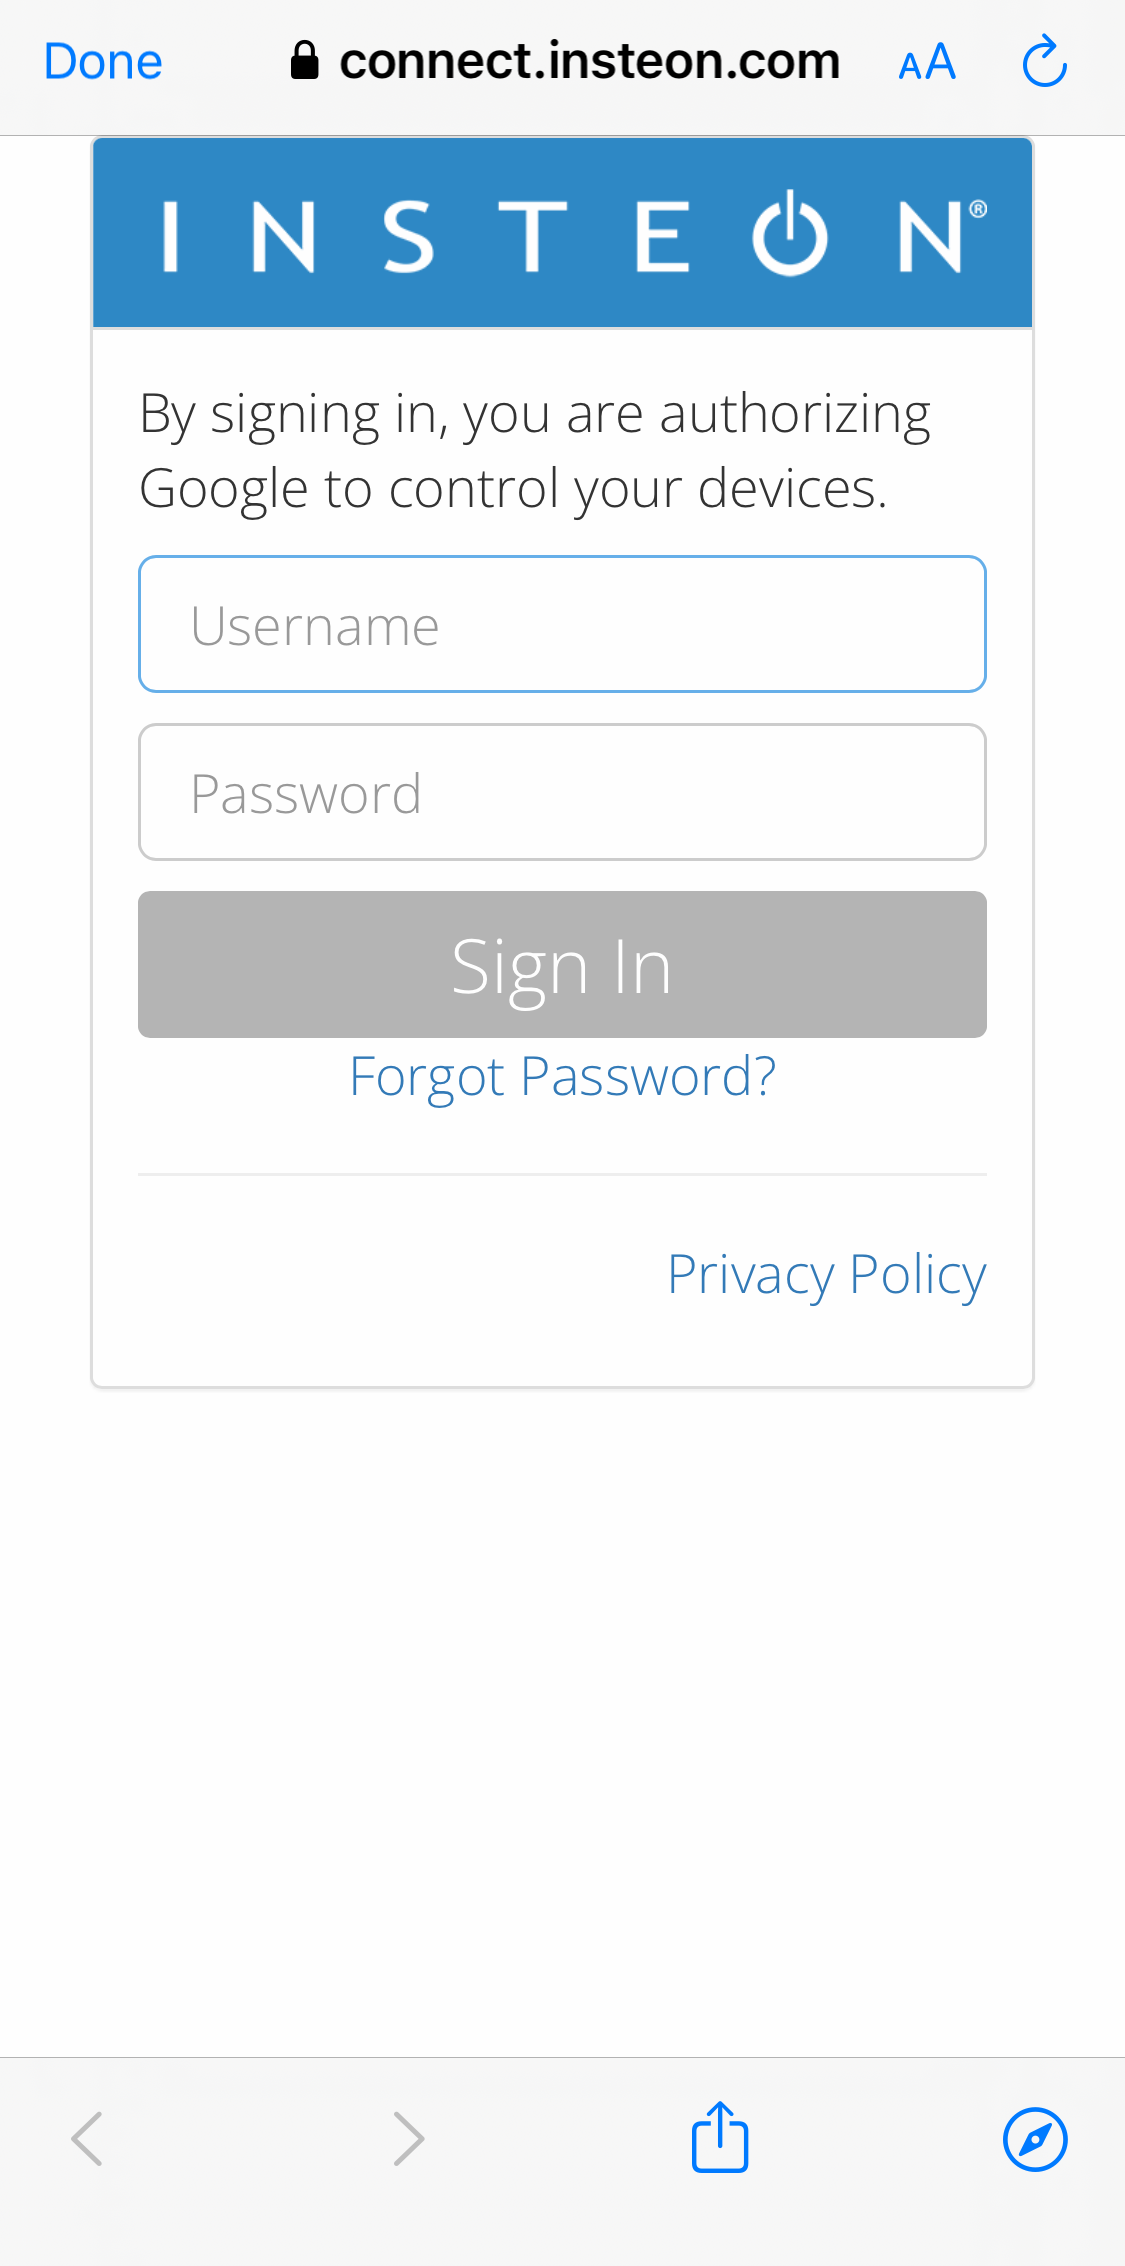
Step 4
Enter your username (email) and password associated with your Insteon Hub account then tap “Sign In”
Step 5
Select the home for your Insteon devices and then tap Next

Step 6
You will see a list of your devices*. Google Home will ask that you place each of the devices into rooms one at a time. To bypass these steps, tap the X (upper right).
*Scenes created in the Insteon mobile apps do not get shown with your devices list. You can still use your voice to activate any scenes you’ve created but to control it from the app, you will need to set up a routine within the Google Home app.

Google Assistant and Supported Insteon Thermostats
The Google Assistant supports control of several different Insteon Thermostats; you can increase or decrease the temperature and change modes just by asking the Google Assistant. Use the information in this article to identify if you have a compatible Insteon Thermostat. Note that an Insteon Hub (2245-222) is required to enable voice control from the Google Assistant.
Supported Insteon Thermostats
These Insteon Thermostats are compatible with Amazon Alexa and allow full voice control functionality of setting temperature and changing modes.
Insteon Wired Thermostat
- Model 2441TH (Revision 1.1 or later)

Unsupported Insteon Thermostats
These Insteon Thermostats are not explicitly incompatible with the Google Assistant but are not guaranteed to function as expected.
Insteon Thermostat for Heat Pumps
- Model 2732-242 (Any Revision)

Incompatible Insteon Thermostats
These Insteon Thermostats are incompatible with the Google Assistant and cannot be controlled.
Insteon Wired Thermostat
- Model 2441TH (Revision 1.0)

Insteon Wireless Thermostat
- Model 2441ZTH
- Model 2441ZTHR
- Model 2732-433
- Model 2732-432

Insteon Venstar Thermostat Adapter
- Model 2441V
- Model 2441VR

Insteon Venstar Integrated Thermostat
- Model 2491T1E
- Model 2491T1ER
- Model 2491T7E
- Model 2491T7ER

Supported Insteon Devices with the Google Assistant
While the Google Assistant supports control of many Insteon devices, not all devices are supported, some devices may not support all features, and some of those features are accessible only through Insteon scenes. Use the table below to identify if your device is supported.
Google Assistant control requires Insteon Hub (2245-222).
| Device | Supported with the Google Assistant |
|---|---|
| Dimmer Module | |
| On/Off Module | |
| Outdoor On/Off Module | |
| LED Bulb (A19) |
|
| LED Bulb for Recessed Lights (PAR38) |
|
| Dimmer Switch | |
| Dimmer Switch (1000W) | |
| Dimmer Switch (2-Wire) | |
| On/Off Switch | |
| Dimmer Toggle Switch | |
| On/Off Toggle Switch | |
| Dimmer Keypad (6-Button) | Controls connected light only - scene buttons are voice controllable through Insteon scenes |
| Dimmer Keypad (8-Button) | Controls connected light only - scene buttons are voice controllable through Insteon scenes |
| On/Off Keypad (6-Button) | Controls connected light only - scene buttons are voice controllable through Insteon scenes |
| On/Off Keypad (8-Button) | Controls connected light only - scene buttons are voice controllable through Insteon scenes |
| Dimmer Outlet | |
| On/Off Outlet (2011) | |
| On/Off Outlet (2014) | Controls top outlet only - bottom outlet is voice controllable through Insteon scenes |
| Wired Thermostat | Not all revisions support control with the Google Assistant. |
| Wireless Thermostat | - |
| Venstar Thermostat Adapter | - |
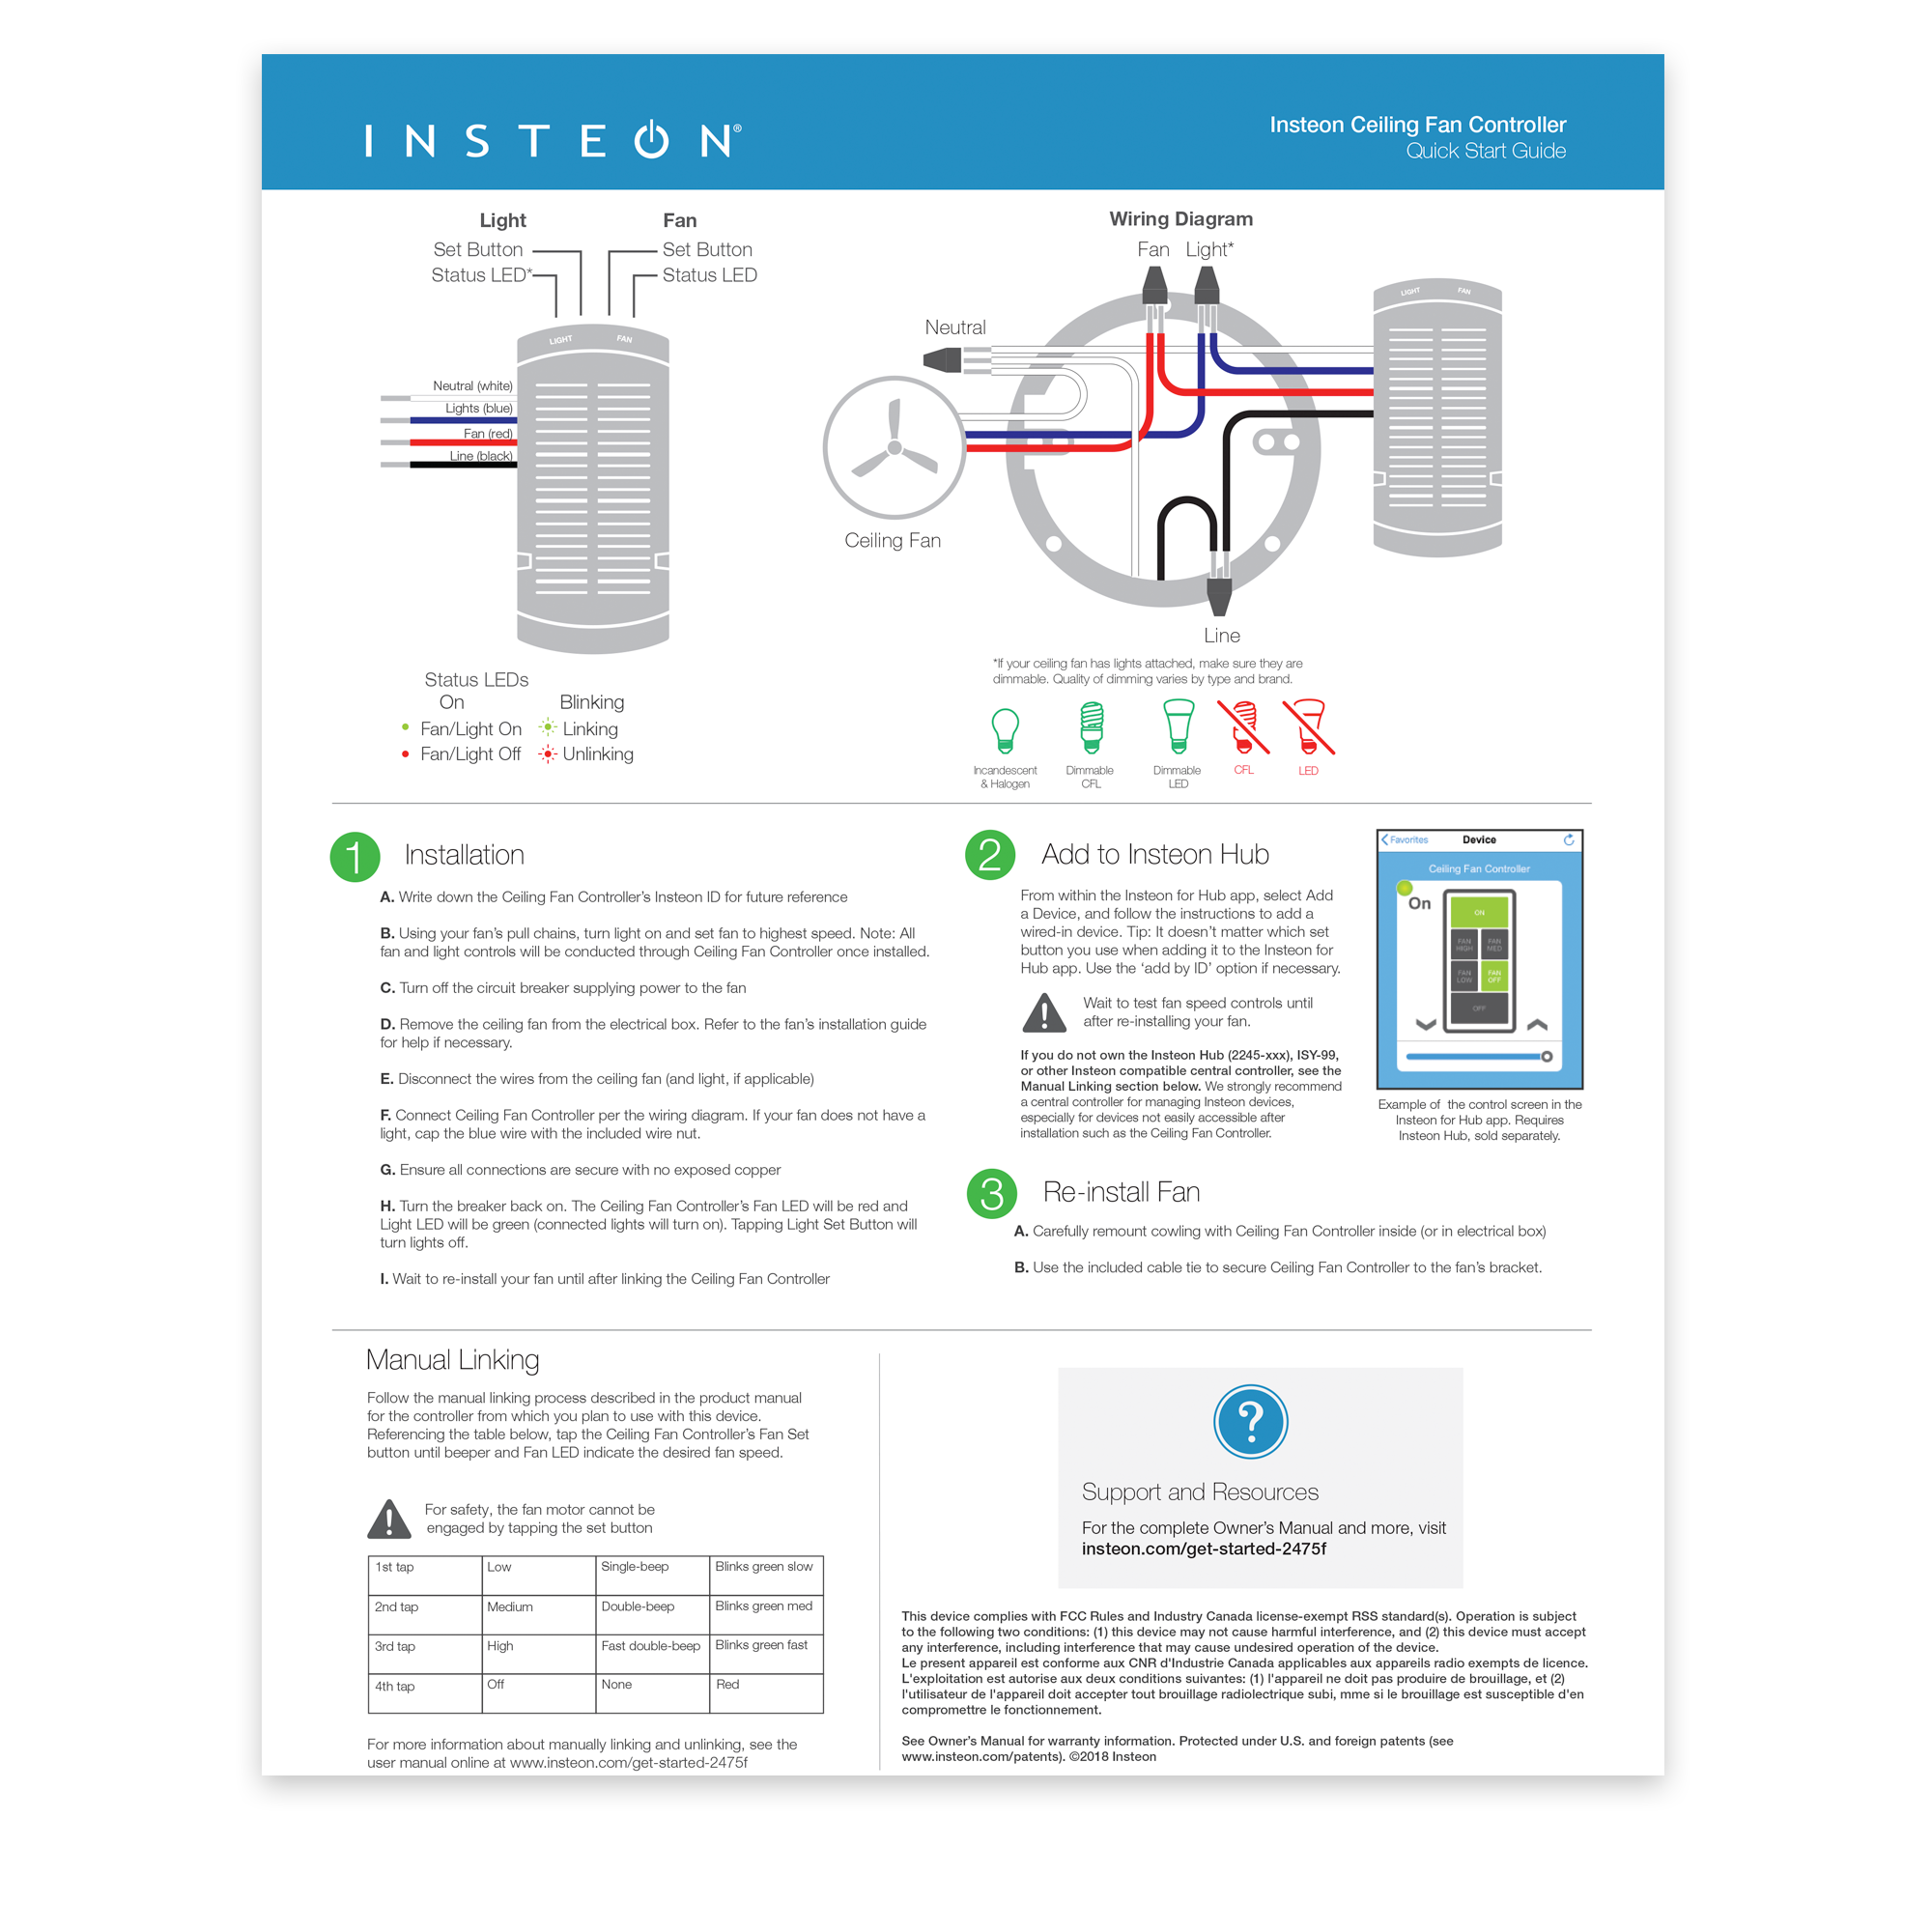
| Ceiling Fan Controller | Controls connected light when addressing device directly - fan speeds are voice controllable through Insteon scenes |
| Dimmer DIN Rail Module | |
| On/Off DIN Rail Module | |
| Dimmer Micro Module | |
| On/Off Micro Module | |
| Open/Close Micro Module | - |
| 0-10V Ballast Dimmer | |
| Dimmer In-Line Module | |
| On/Off In-Line Module | |
| 220V Load Controller (Normally Open) | - |
| 220V Load Controller (Normally Closed) | - |
| WiFi Cameras | - |
| Open/Close Sensor | - |
| Hidden Door Sensor | - |
| Motion Sensor | - |
| Leak Sensor | - |
| Smoke Bridge | - |
| IO Module | - |
| Mini Remotes | - |
| Door Lock and Deadbolt Controller | - |
| IR Transmitter | - |
| IR Receiver | - |
| Serial Bridge | - |
| iMeter Solo | - |
| SynchroLinc | - |
Insteon Hub Pro (HomeKit-enabled) - Quick Start Guide

Motion Sensor II - Owner's Manual

Motion Sensor II - Quick Start Guide

Motion Sensor II Setup
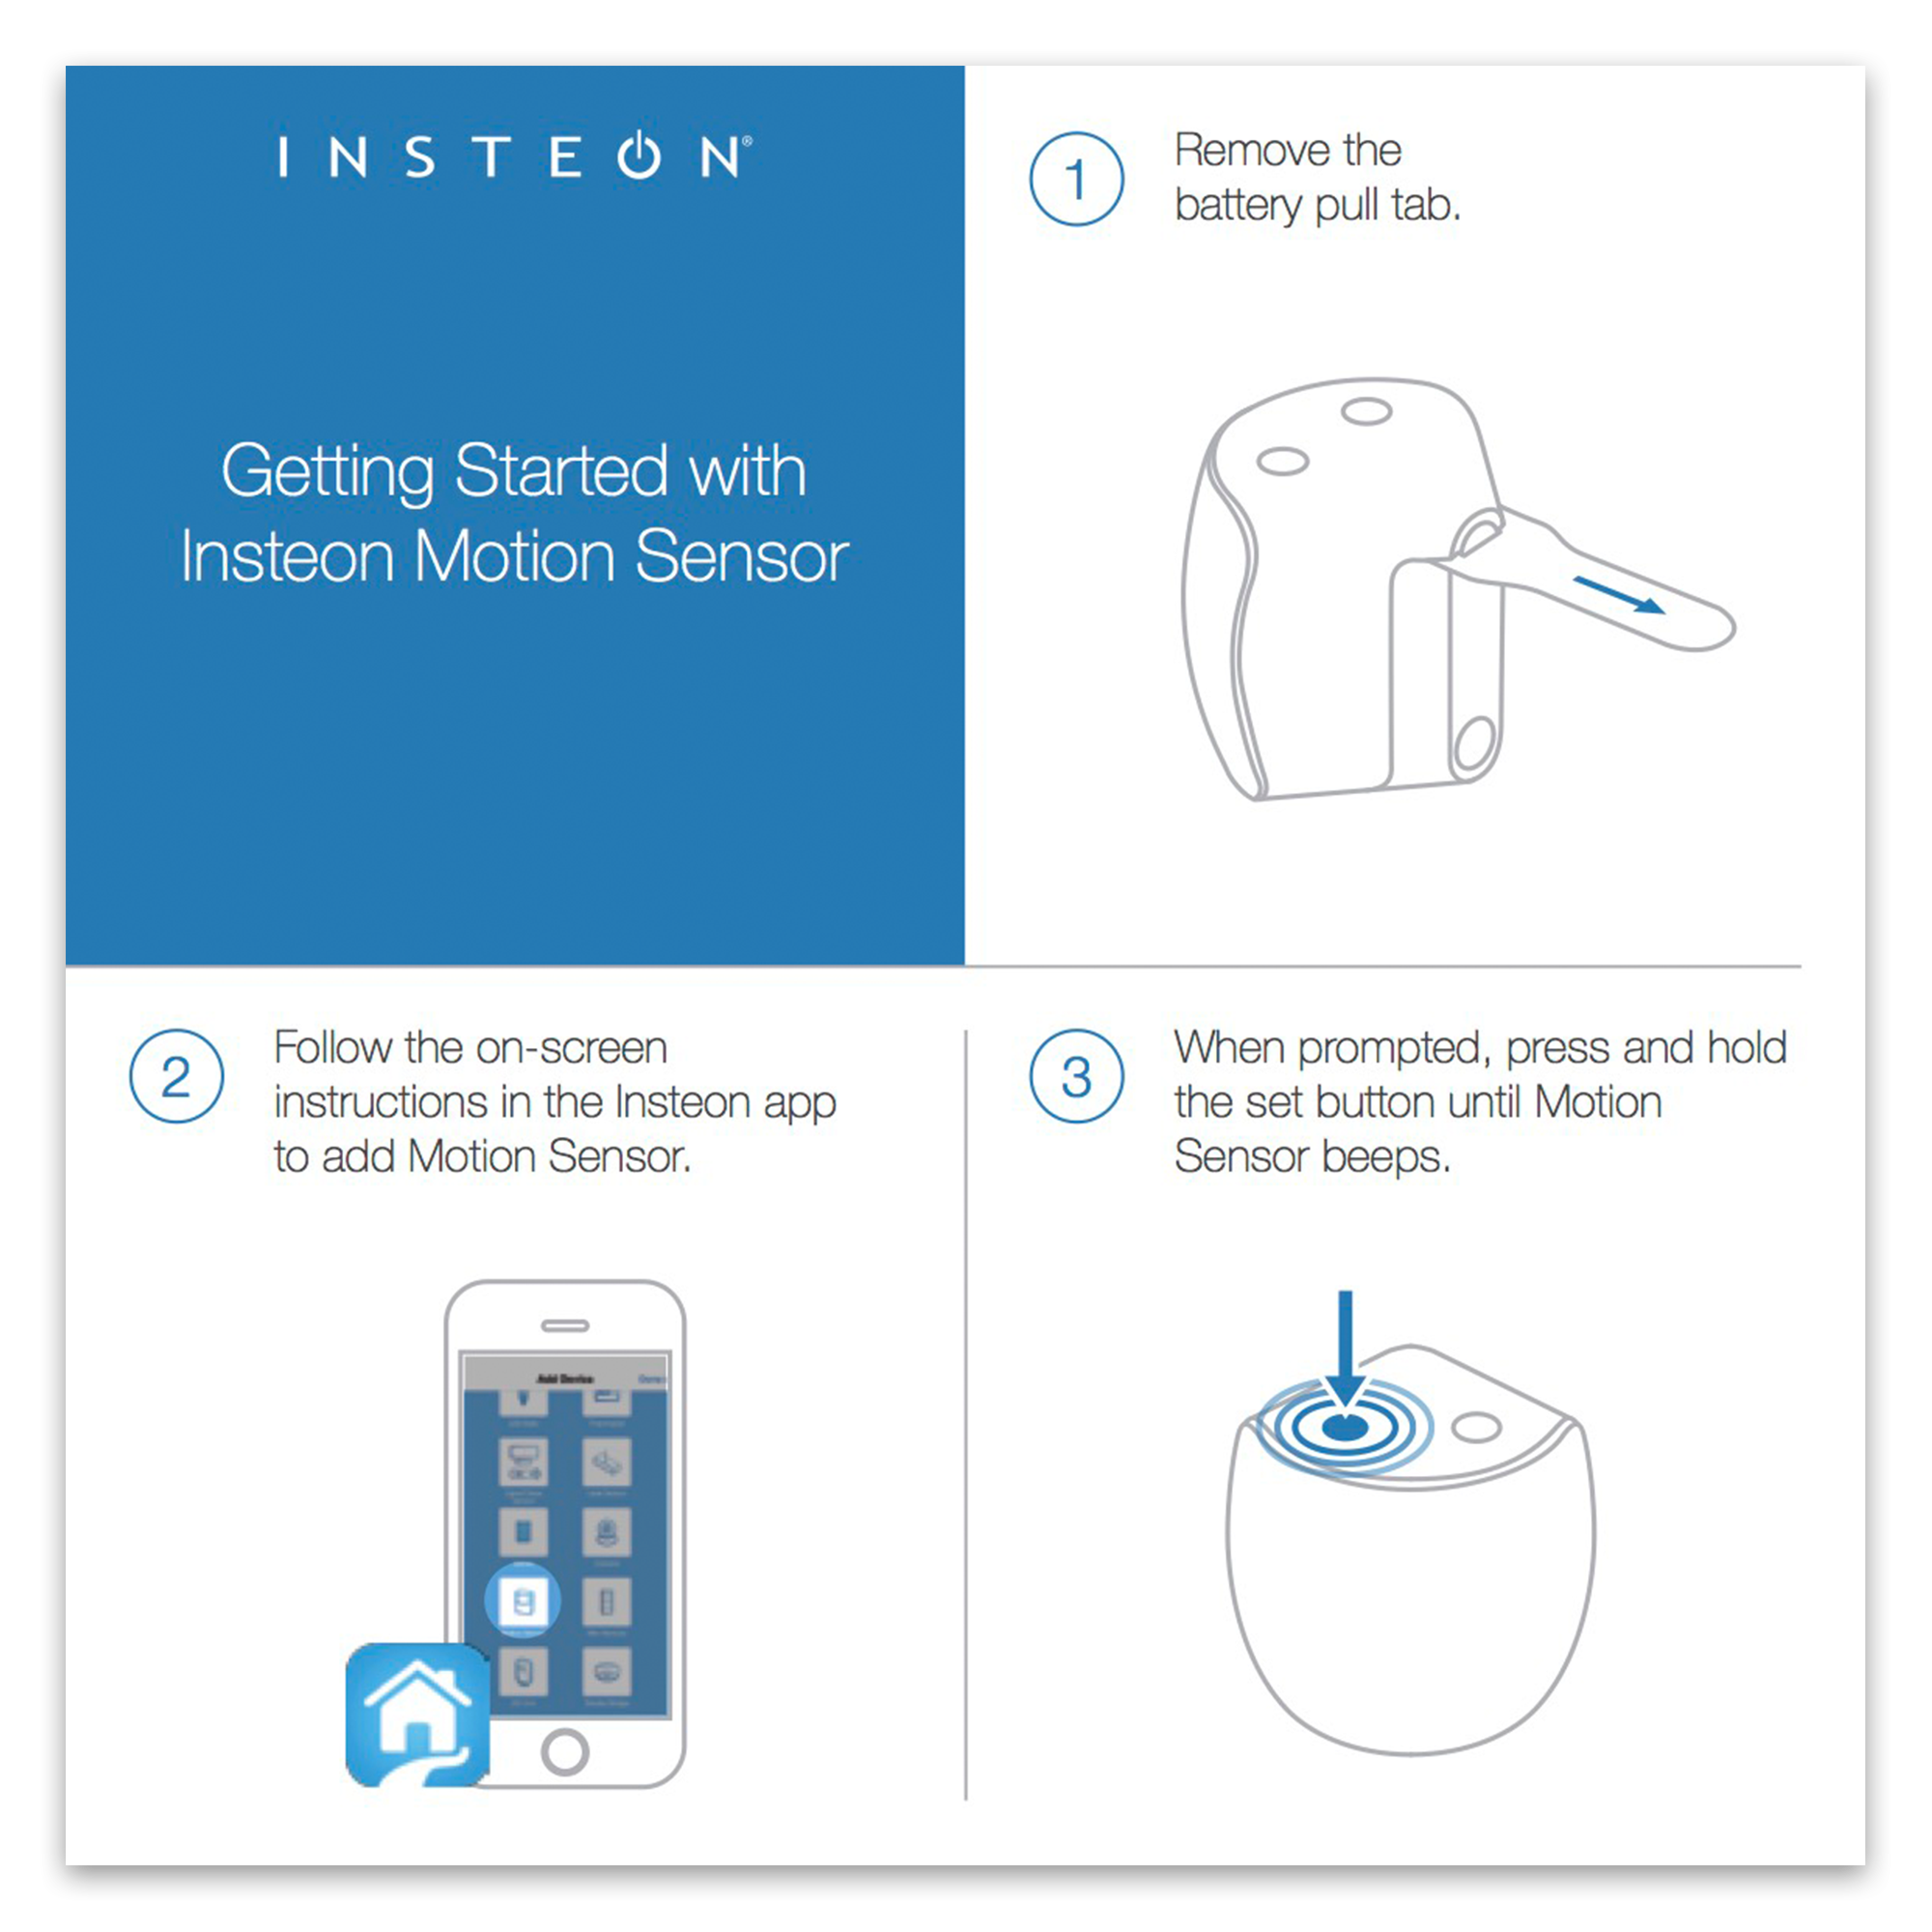
Getting Started
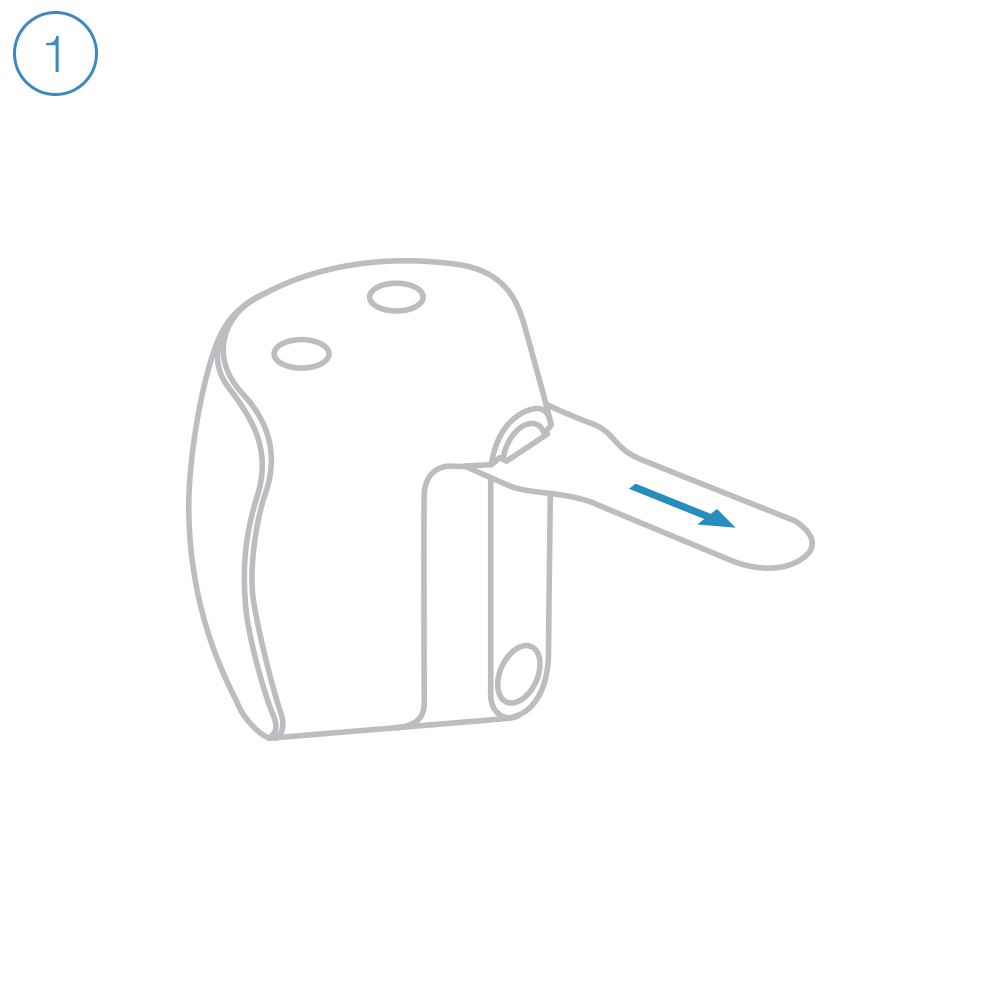
Remove the battery pull tab.
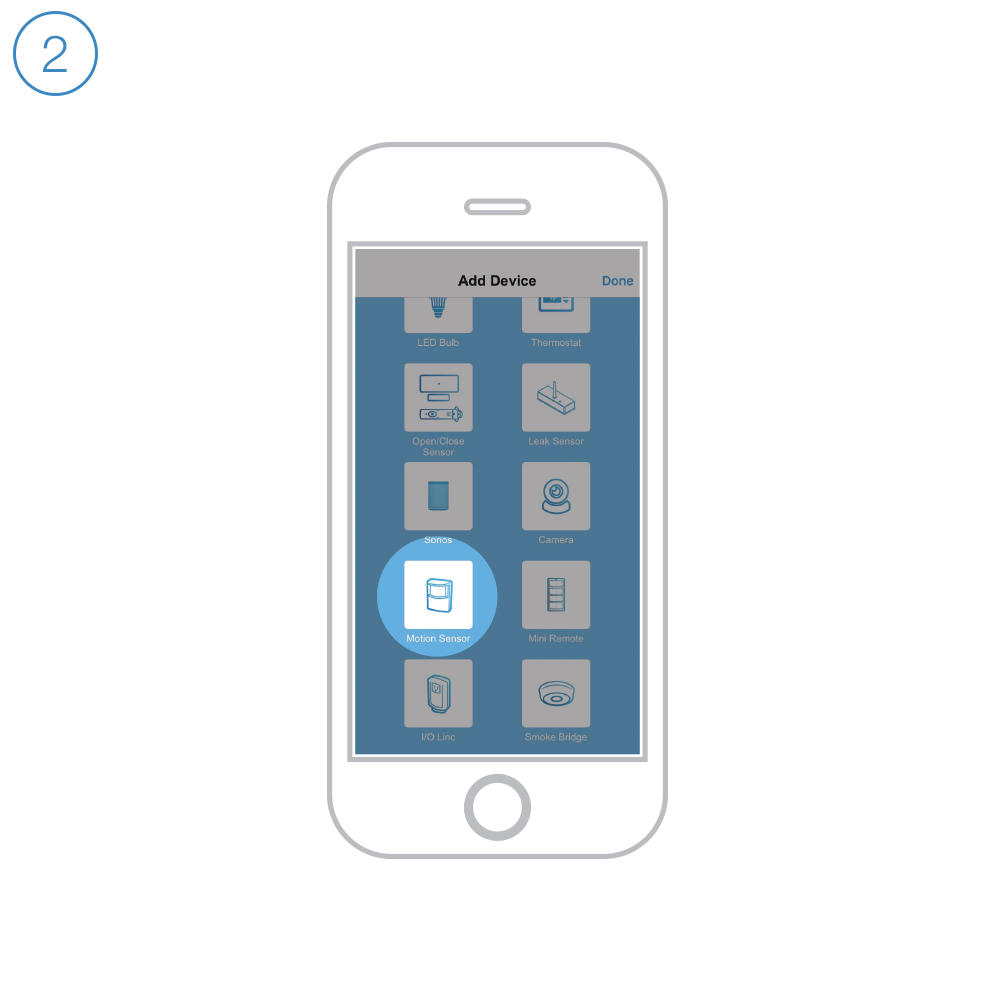
Follow the on-screen instructions in the Insteon app to add Motion Sensor.
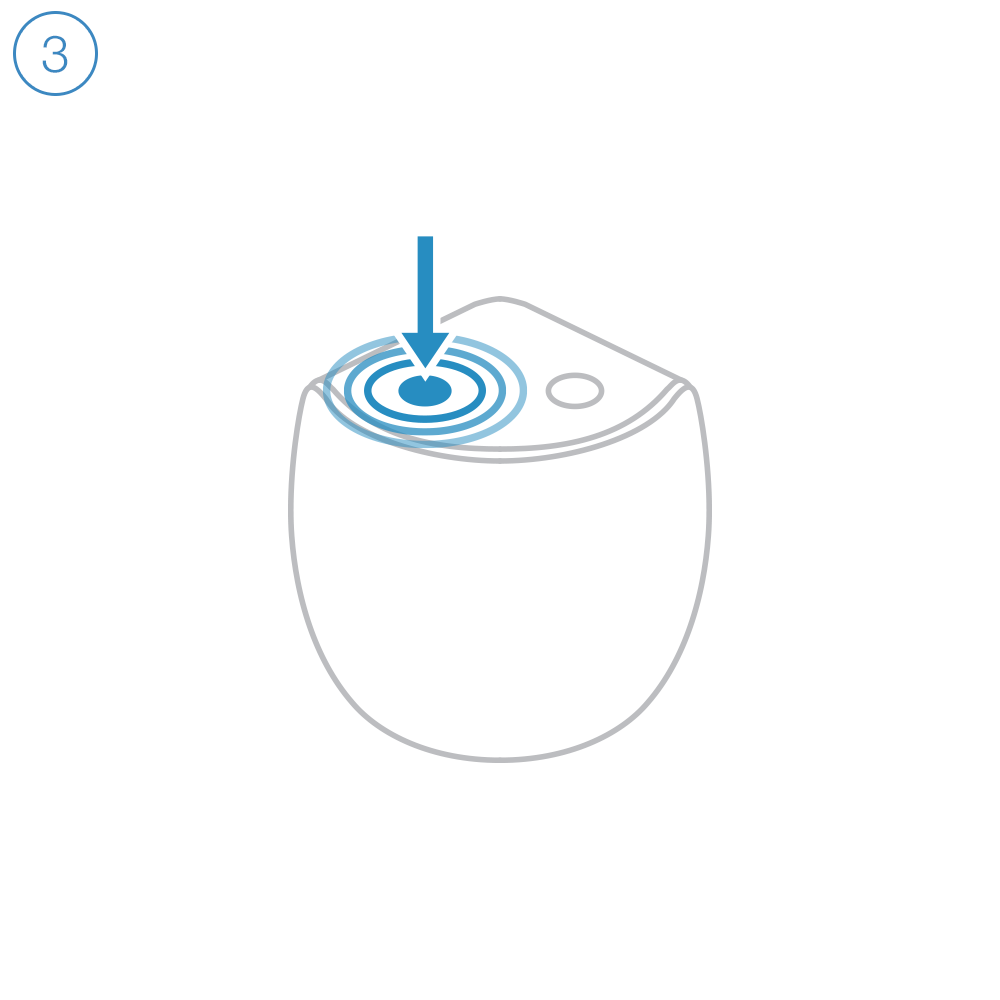
When prompted, press and hold the set button until Motion Sensor beeps.
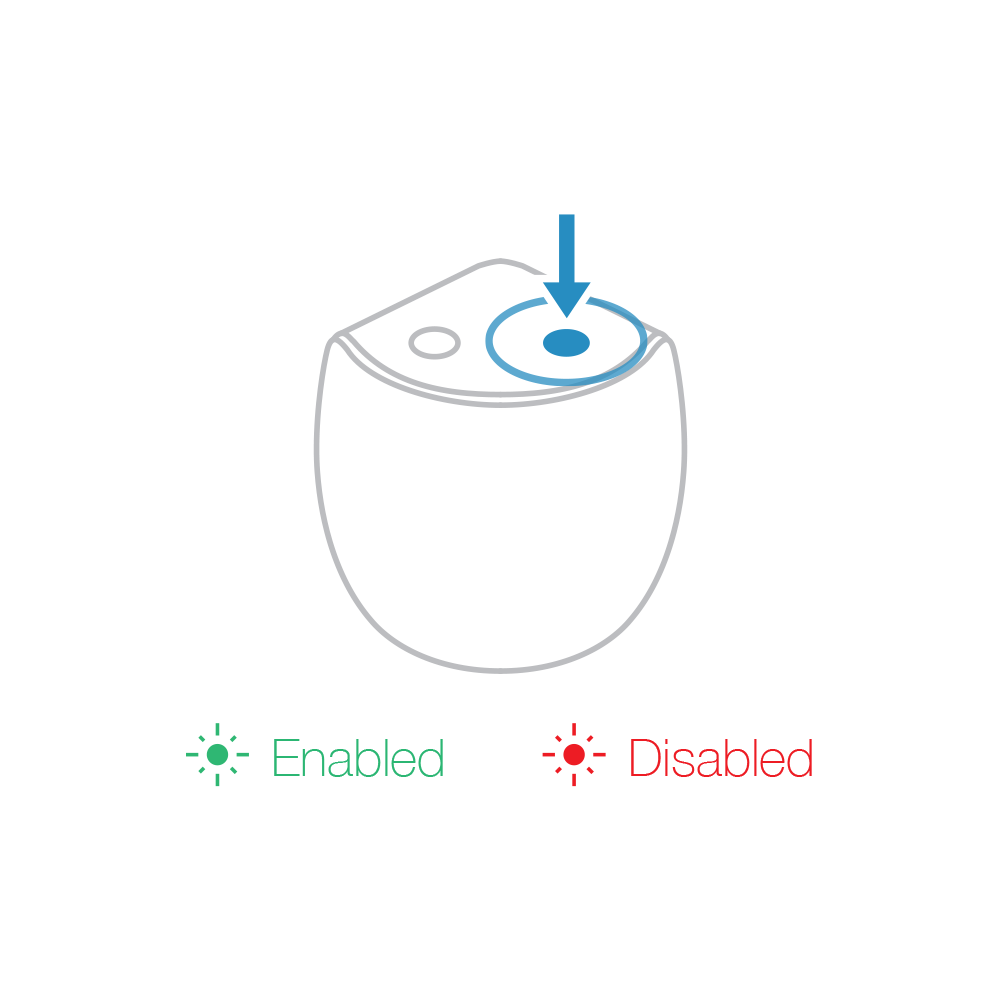
Tap the Motion button to enable or disable motion detection. Default disable time is 12 hours after which motion detection will resume.
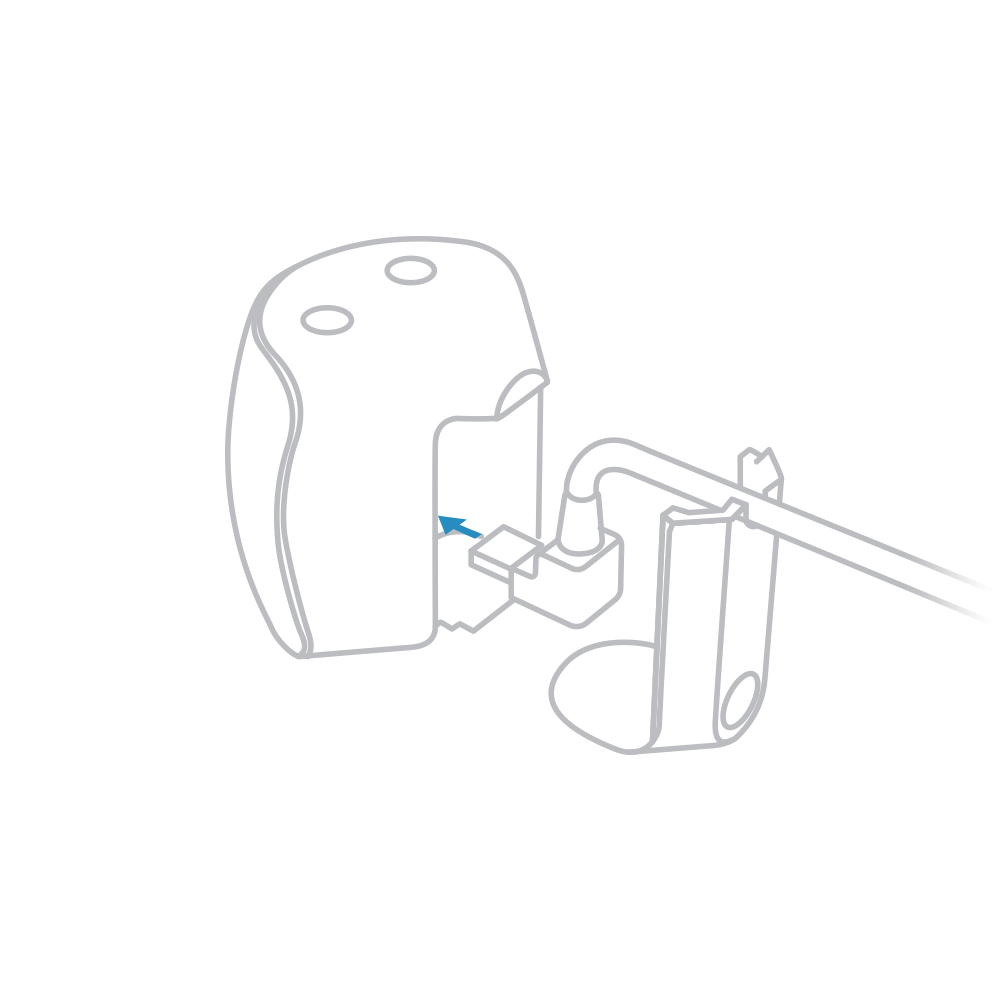
Motion Sensor can be connected to power with an optional Micro USB cable (sold separately).
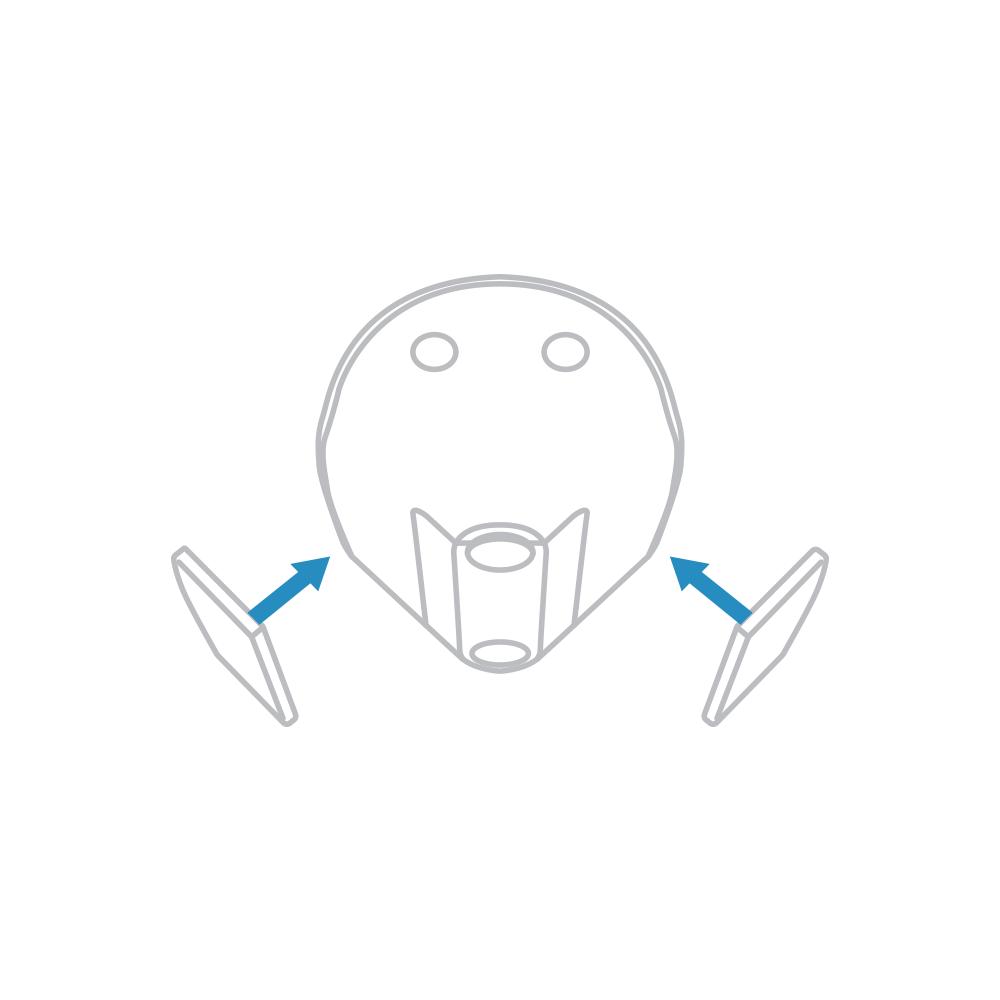
Use the reusable mounting strips for corner placement.
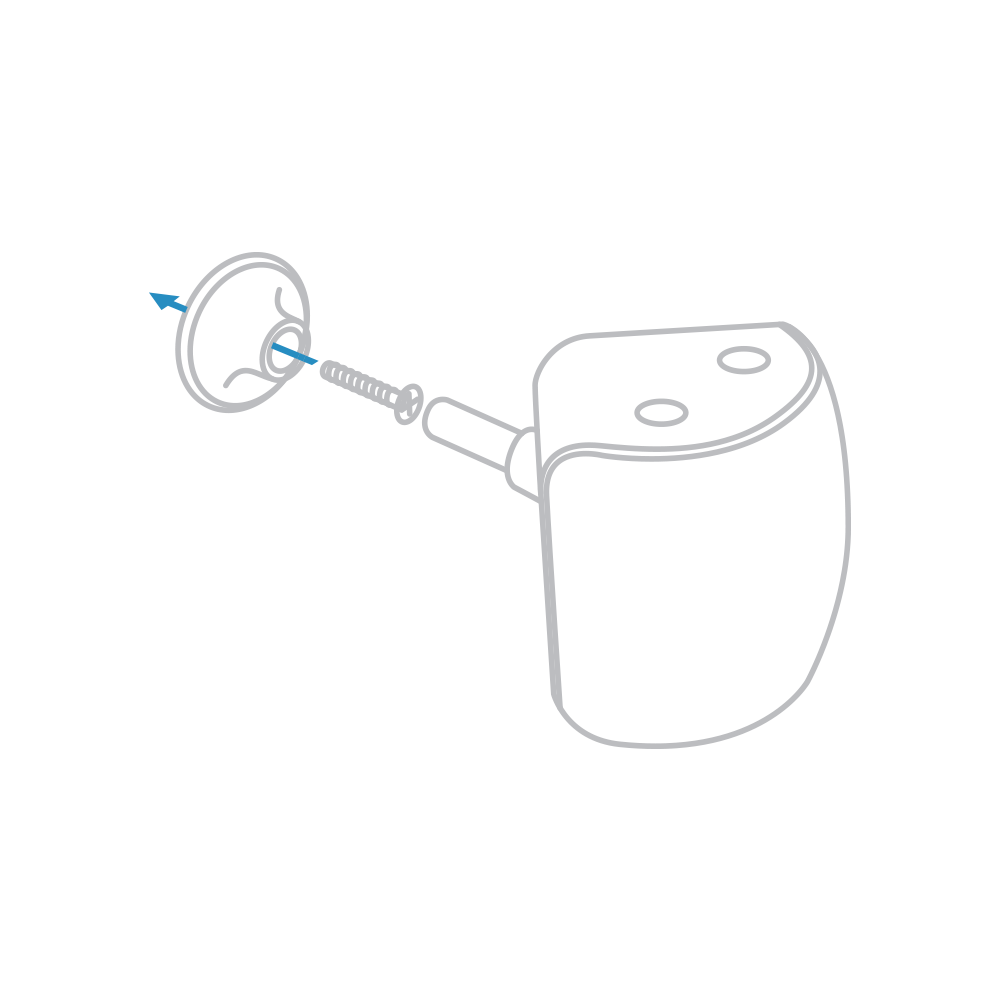
For precise positioning, use the flexible mount.
Guides and Manuals
Quick Start Guide
Featured
Owner's Manual
Featured

Going Further


Arm and Disarm Siren from an Insteon Device
Insteon Siren supports remote arming and disarming from other Insteon devices. Follow the steps in this article to configure a Wall Keypad to arm and disarm Siren.
Configure Arm and Disarm Devices on iPhone, iPad and iPod touch
Step 1
Configuring Arm and Disarm devices requires creating a Scene. Swipe right to open the drawer and tap Create a Scene

Step 2
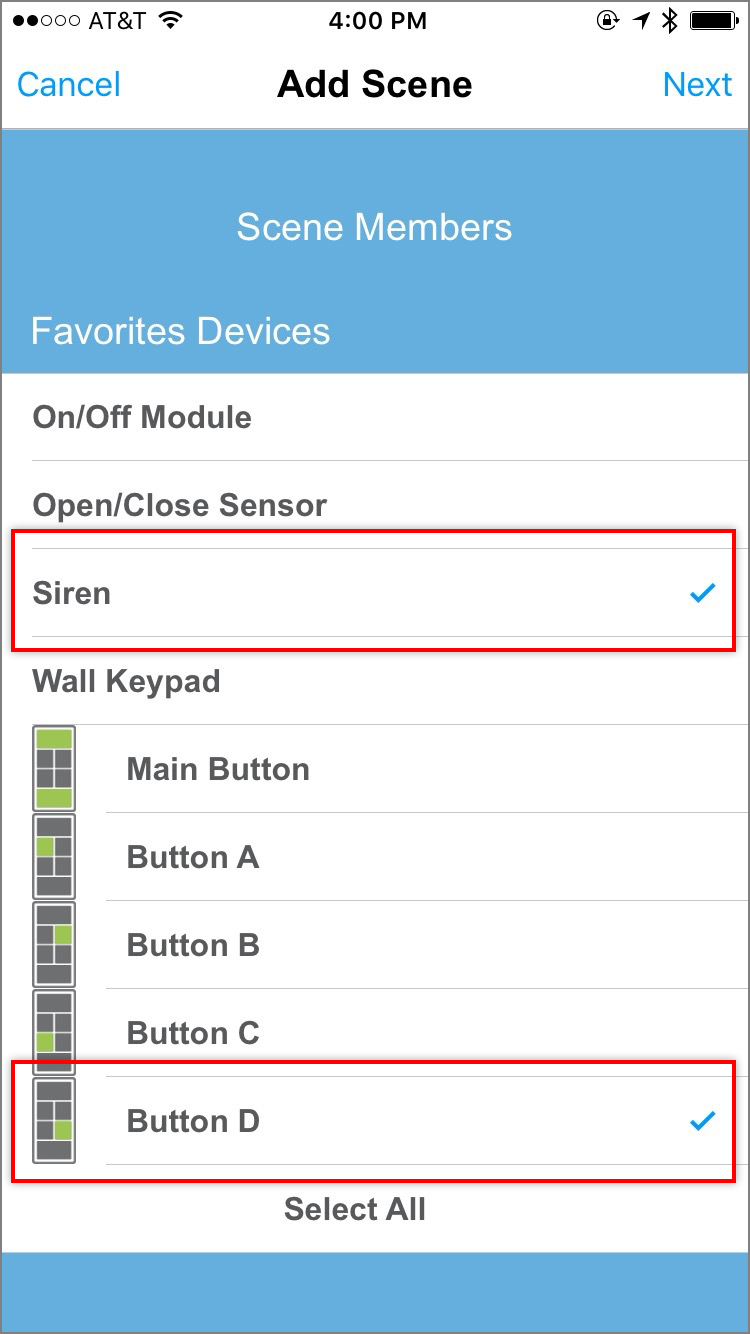
Give your Scene a name and select both Siren and the desired arming and disarming device. If you are using a Wall Keypad, select the desired arming and disarming button.
When ready, tap Next.
Step 3
For the Keypad Button, tap the blue button until it reads Controller.

Step 4
For Siren, tap the green button until it reads Arm/Disarm.

Step 5
When ready, tap Done.
The Insteon app will create your scene.

Multiple Arm and Disarm Devices
You can arm and disarm Siren from multiple Insteon devices. When selecting the devices in Step 2, select all desired arm and disarm devices. Repeat Step 3 for all arm and disarm devices.

Configure Arm and Disarm Devices on Android
Step 1
Configuring Arm and Disarm devices requires creating a Scene. Navigate to Settings by tapping Settings and then Edit Settings.

Step 2
Tap Scenes.

Step 3
Tap Create a Scene.

Step 4
Give your Scene a name and select both Siren and the desired arming and disarming device. If you are using a Wall Keypad, select the desired arming and disarming button.
When ready, tap Next.

Step 5
For the Keypad Button, tap the blue button until it reads Controller.

Step 6
For Siren, tap the green button until it reads Arm/Disarm.

Step 7
When ready, tap Done.
The Insteon app will create your scene.

Multiple Arm and Disarm Devices
You can arm and disarm Siren from multiple Insteon devices. When selecting the devices in Step 4, select all desired arm and disarm devices. Repeat Step 5 for all arm and disarm devices.

Trigger Siren with an Insteon Sensor
Insteon Siren supports both a Chime and Siren notification when armed. Follow the steps in this article to configure an Insteon Sensor to trigger Siren.
Configure Siren on iPhone, iPad and iPod touch
Step 1
Configuring Chime or Siren alerts requires creating a Scene. Swipe right to open the drawer and tap Create a Scene

Step 2
Give your Scene a name and select both Siren and the desired triggering devices.

Step 3
For all triggering devices, tap the blue button until it reads Controller. Sensors are automatically configured as Controller.
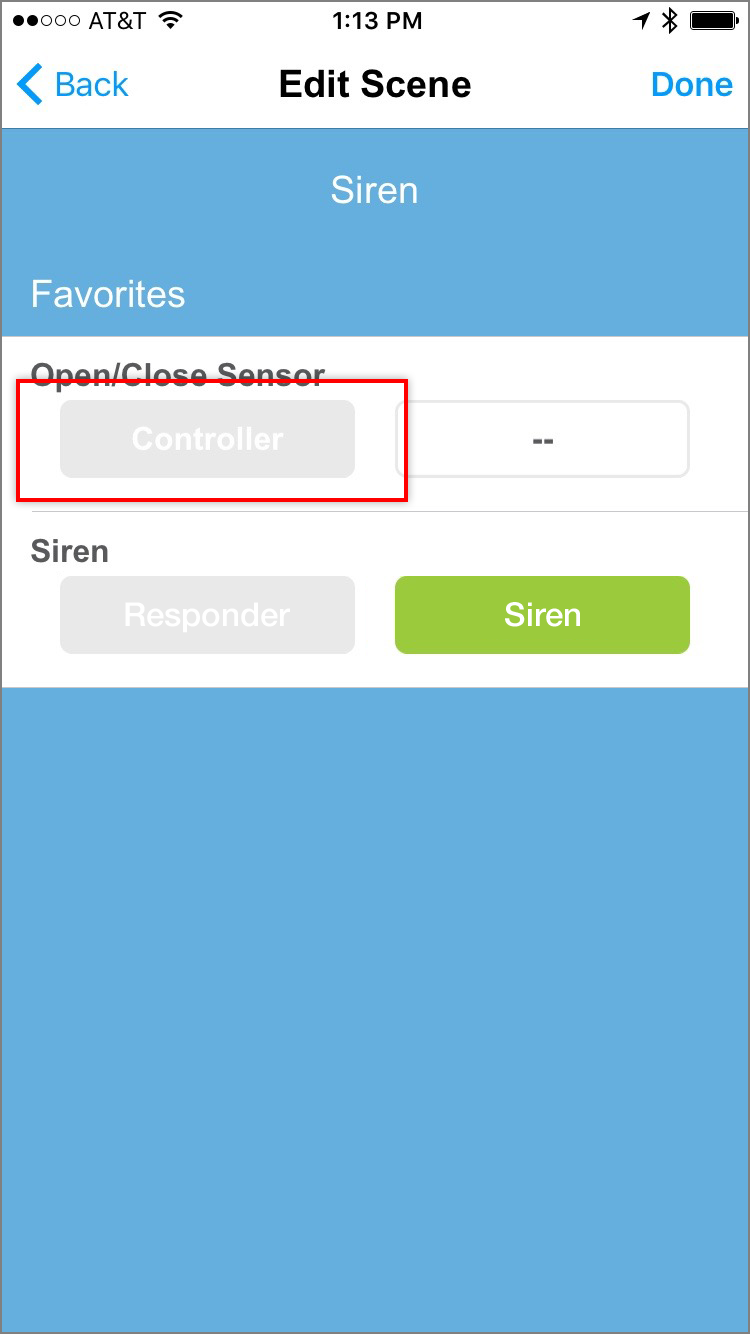
Step 4
For Siren, tap the green button until it reads Chime or Siren, depending on the type of alert you would like to configure.

Step 5
When ready, tap Done.
The Insteon app will create your scene.

Configure Siren on Android
Step 1
Configuring Chime or Siren alerts requires creating a Scene. Navigate to Settings by tapping Settings and then Edit Settings.

Step 2
Tap Scenes.

Step 3
Tap Create a Scene.

Step 4
Give your Scene a name and select both Siren and the desired triggering devices.

Step 5
For all triggering devices, tap the blue button until it reads Controller. Sensors are automatically configured as Controller.

Step 6
For Siren, tap the green button until it reads Chime or Siren, depending on the type of alert you would like to configure.

Step 7
When ready, tap Done.
The Insteon app will create your scene.

Siren - Quick Start Guide

Siren Setup
Getting Started

Caution
Insteon Siren is loud. Use hearing protection when testing in close proximity.
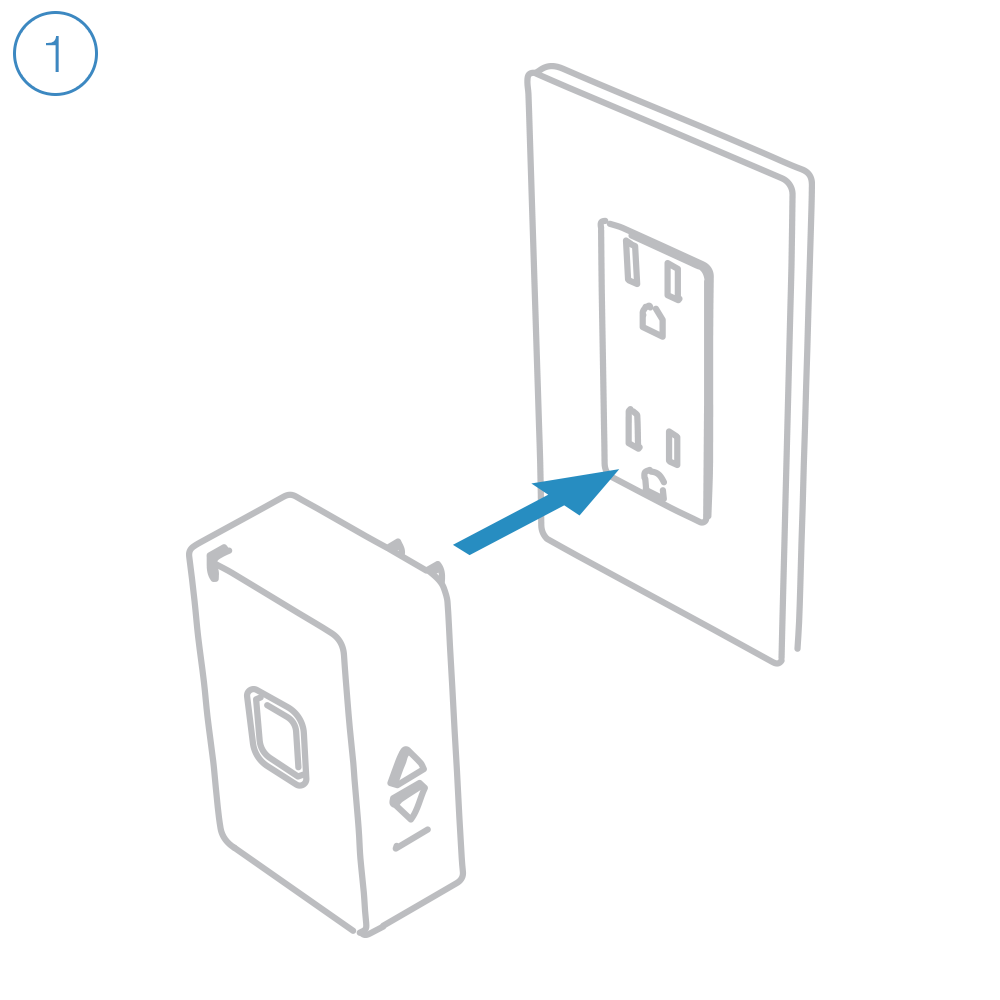
Plug Insteon Siren into a power outlet.
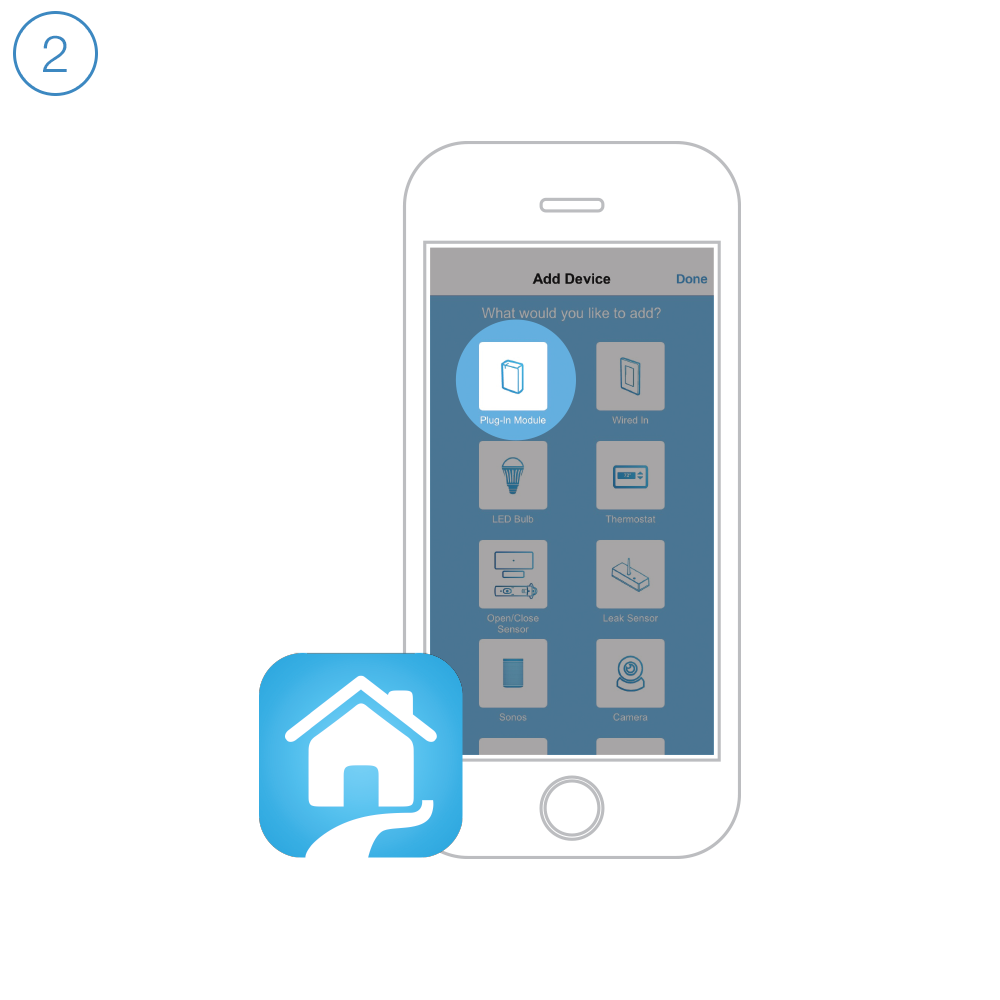
Follow the on-screen instructions in the Insteon app to add Siren.
The Insteon app requires Insteon Hub.
Learn More →
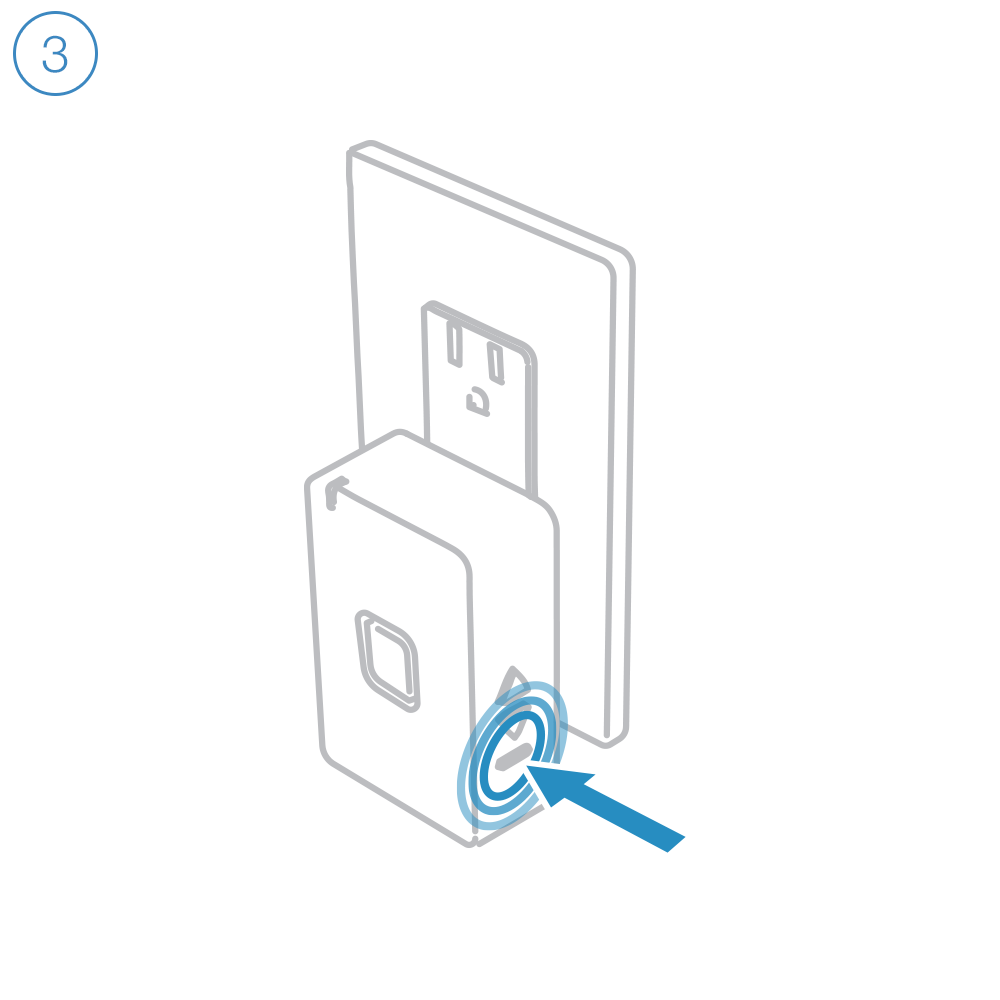
When prompted, press and hold the set button until Siren beeps.
Guides and Manuals
Quick Start Guide
Featured

Owner's Manual
Featured

Going Further
Siren - Owner's Manual

Controlling Insteon Scenes with Amazon Alexa
Controlling lights with your voice is a fast and easy way to turn lights on, off or set the lights to a dim level. But what happens if you want to control more than one device at a time? And what if you want each device to do different things (Living room light 50%, Ceiling light 25%, Dining room off, etc.)? Using the Alexa app offers a way to group more than one device together and control them using a single voice command (i.e., Alexa, turn on dinner time). However, with Alexa groups you can only choose between turning the devices on or off all together - no ability to set each light to a unique level or state. In addition, Alexa group members are controlled one at a time, which means you'll see lights activated in a sequence over several seconds, creating a popcorn effect (but without the delicious buttery flavor).
For the best possible experience, we recommend using Insteon scenes. They provide a super-fast and instantaneous response across all devices, regardless if it's a scene made up of 2 or 200 devices. And because you can set each scene member to a unique level, you can create incredible lighting effects.
Here's an example video clip showing the difference between Insteon scenes and Amazon Alexa/Echo group control.
To learn how to create Insteon scenes, please see the following support articles:
Things to Keep in Mind When Using Insteon Scenes
If you already have scenes created, there is no need to do anything to start controlling them with Alexa
If a new scene is created you will have to re-run discovery within the Amazon Alexa app, just as you do when adding new devices. Pro Tip: Amazon Alexa does a discovery automatically once an hour or so.
Supported voice control commands: On and Off only. Dim, Bright and Set to % are not supported (of course, you can set these when you create each scene)
Unsupported devices: all access control/security devices (I/O, lock controller, garage control) are automatically suppressed. So if you have scenes that contain actions for any of these types of devices, you will not be able to control the scene with Alexa.
Previously unsupported devices like our ceiling fan controller or the on/off outlet receptacle are now controllable via scenes. If you are an iOS user and have Sonos integrated, you can now activate scenes containing Sonos speakers.
Naming conventions may become an issue. If a scene and device are named the same or are similar, Alexa will have difficulty knowing which one you want to control. The obvious fix is to give scenes and devices unique names.
Using Meljac Wall Switches with Smart Wireless Control System

Meljac Wall Switches can be used with Insteon Micro Modules and Insteon DIN Rail Modules. Use the wiring guides in this article to properly wire your switch and module.
App and Hub Release Notes
Featured


